In-Browser Quickstart
Setting up your first cluster in your browser using the Plural Cloud Shell.
Overview
This guide goes over how to get started with Plural using our in-browser Cloud Shell. At the end of this tutorial, you will have:
- Provisioned a virtual shell loaded with the dependencies to run Plural.
- Created a Plural GitHub repository to store your configuration in.
- Provisioned a fully-configured Kubernetes cluster.
- Installed an application and all its dependencies on your Kubernetes cluster.
in under 30 minutes, all within your browser. You can see the process in the video here or follow the instructions step-by-step, esp for unique cloud providers:
Login and Create the Plural Repository
Once you're logged in, you'll land on the Clusters Overview page. You can click on the "Start onboarding" button to kick off your onboarding process in your shell app.plural.sh/shell.
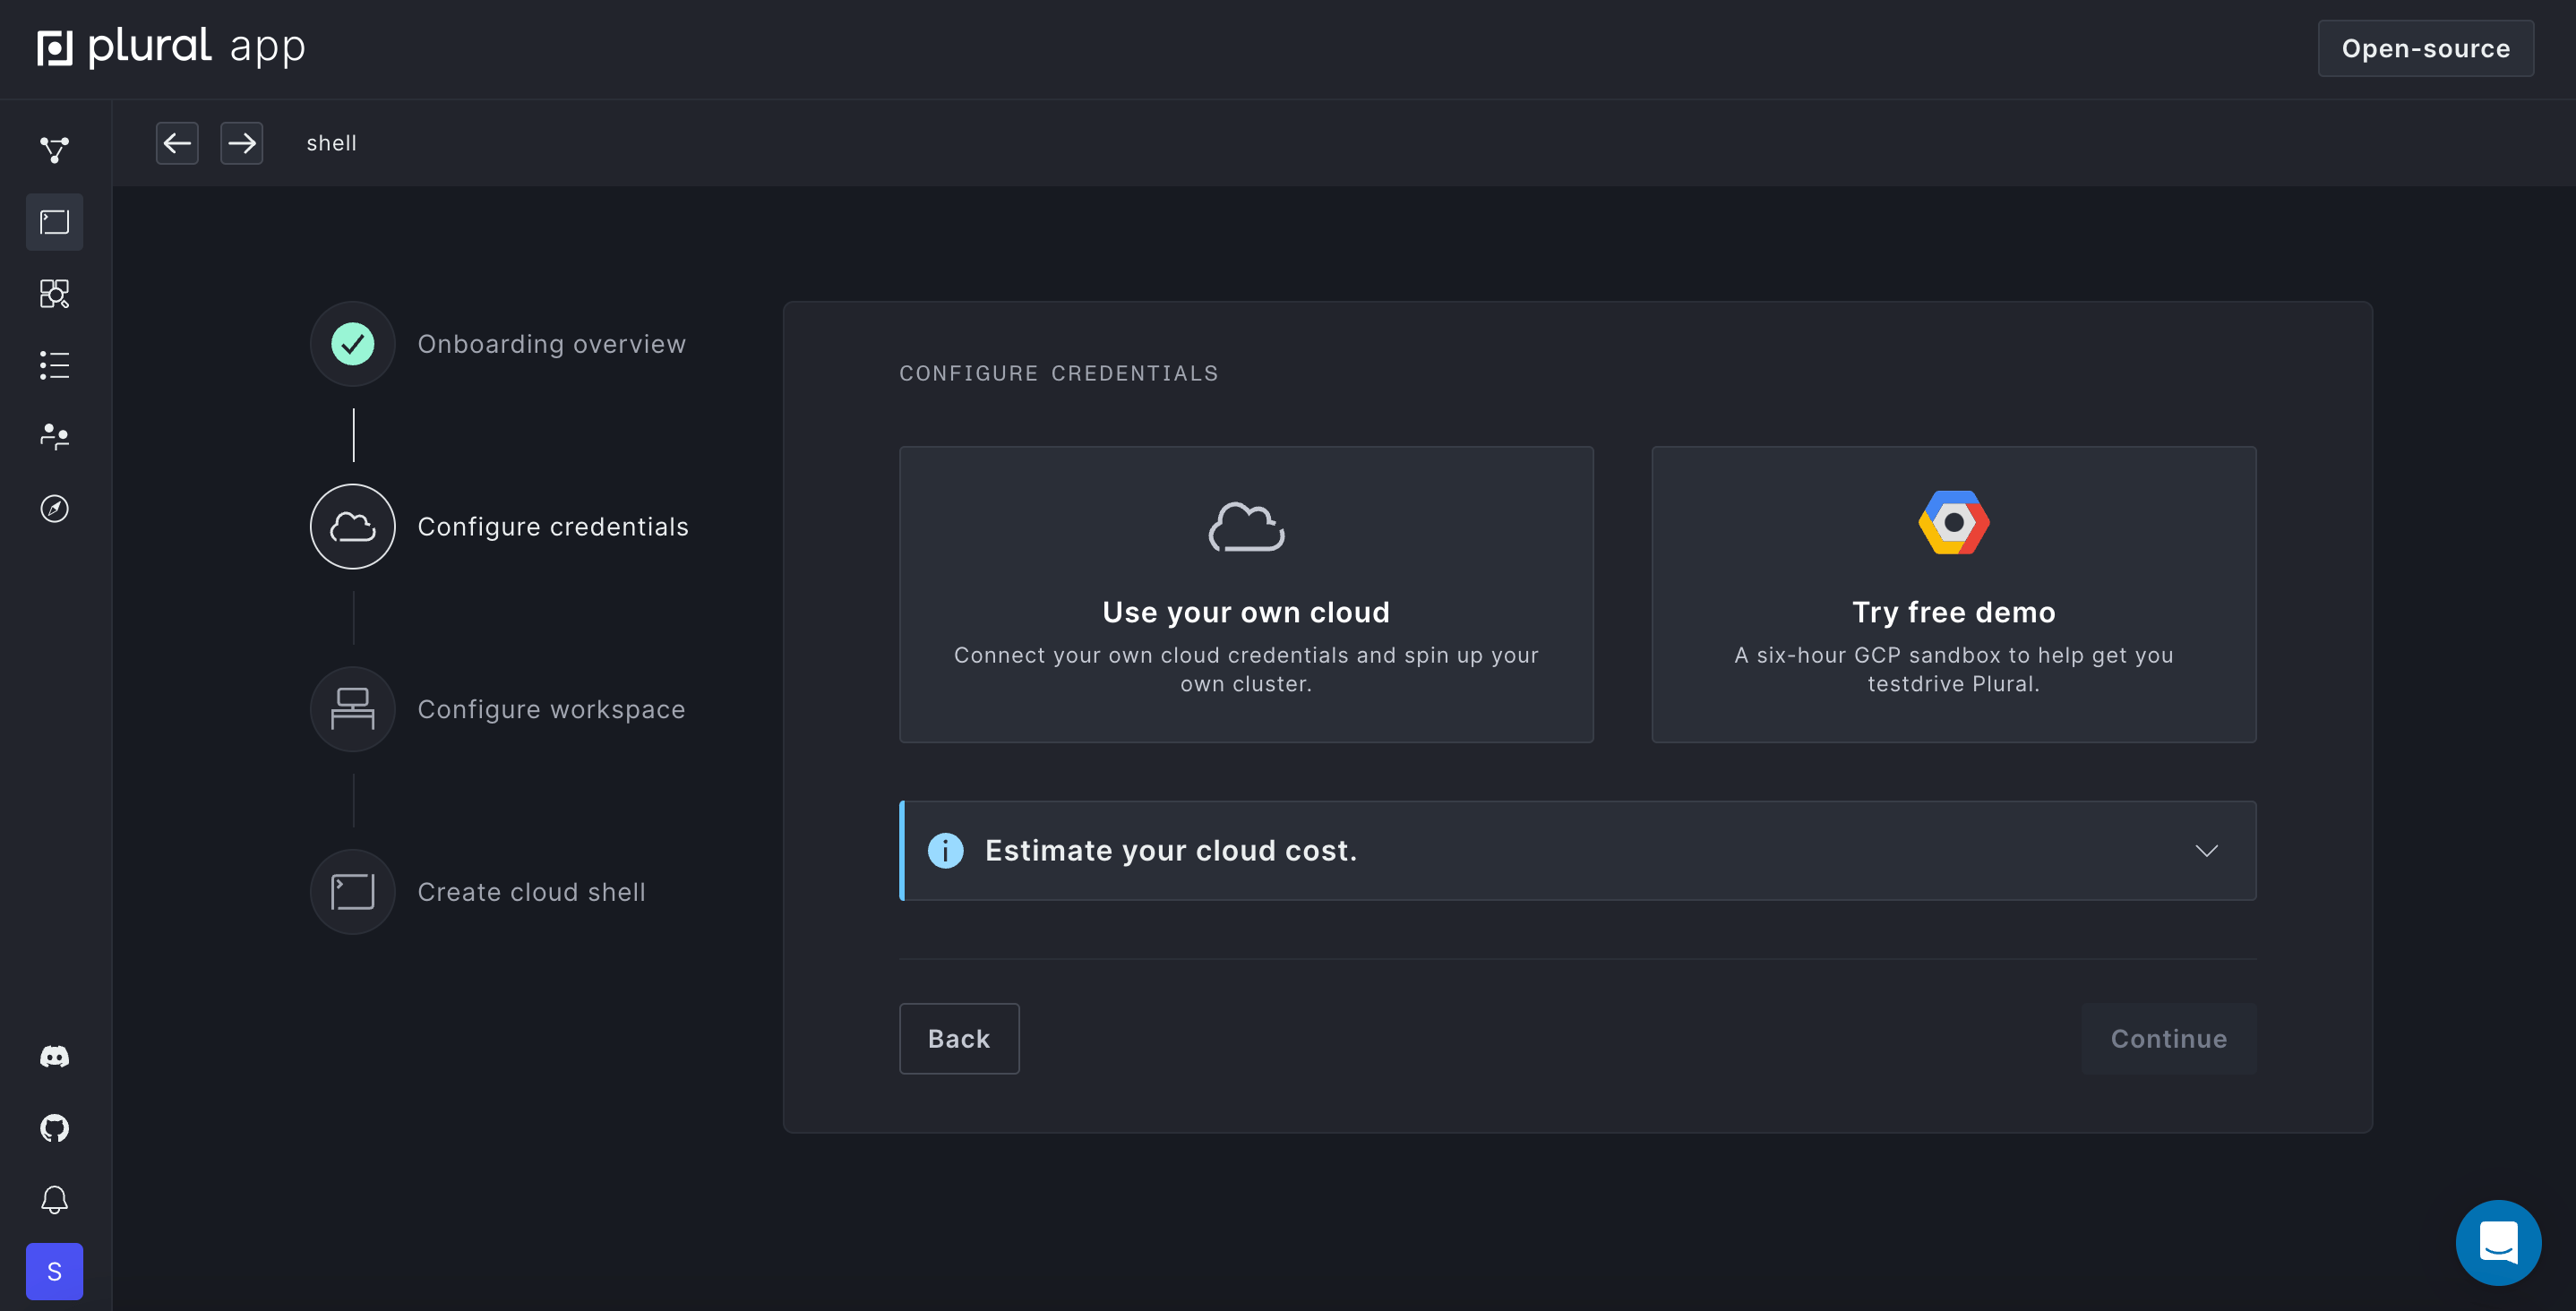
Set up a Cloud Provider
Choose either the option to set up Plural using your own cloud credentials, or try our free 6-hour GCP sandbox demo. If you use your own cloud credentials, choose our Cloud Shell setup option. If you'd prefer to use the CLI, choose "Local terminal" and switch to the CLI quickstart.
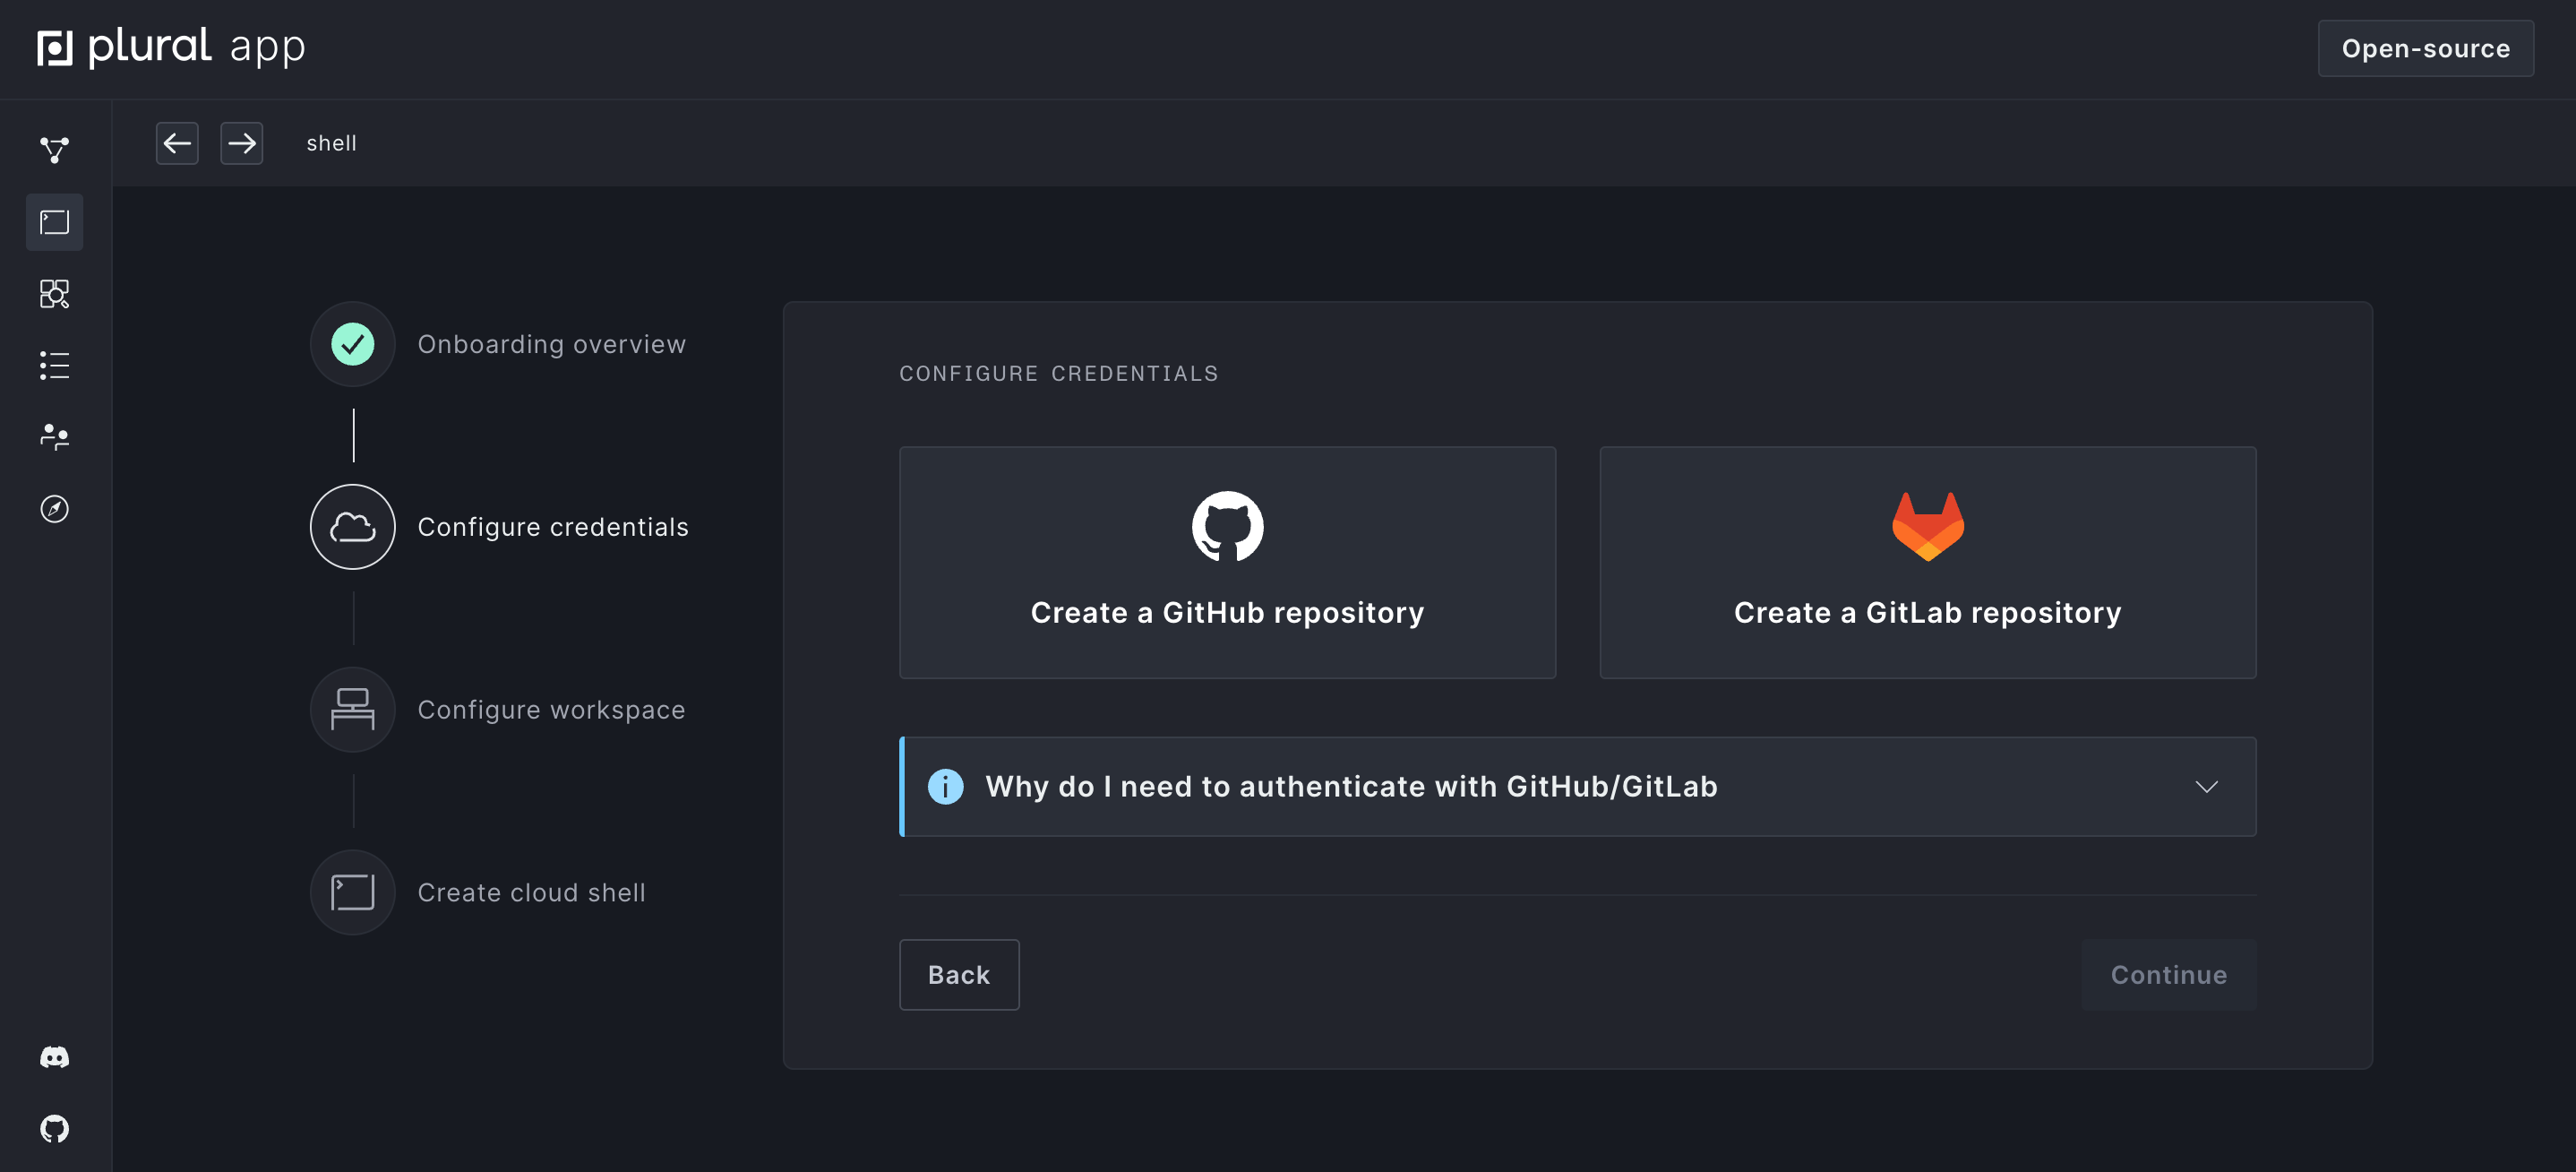
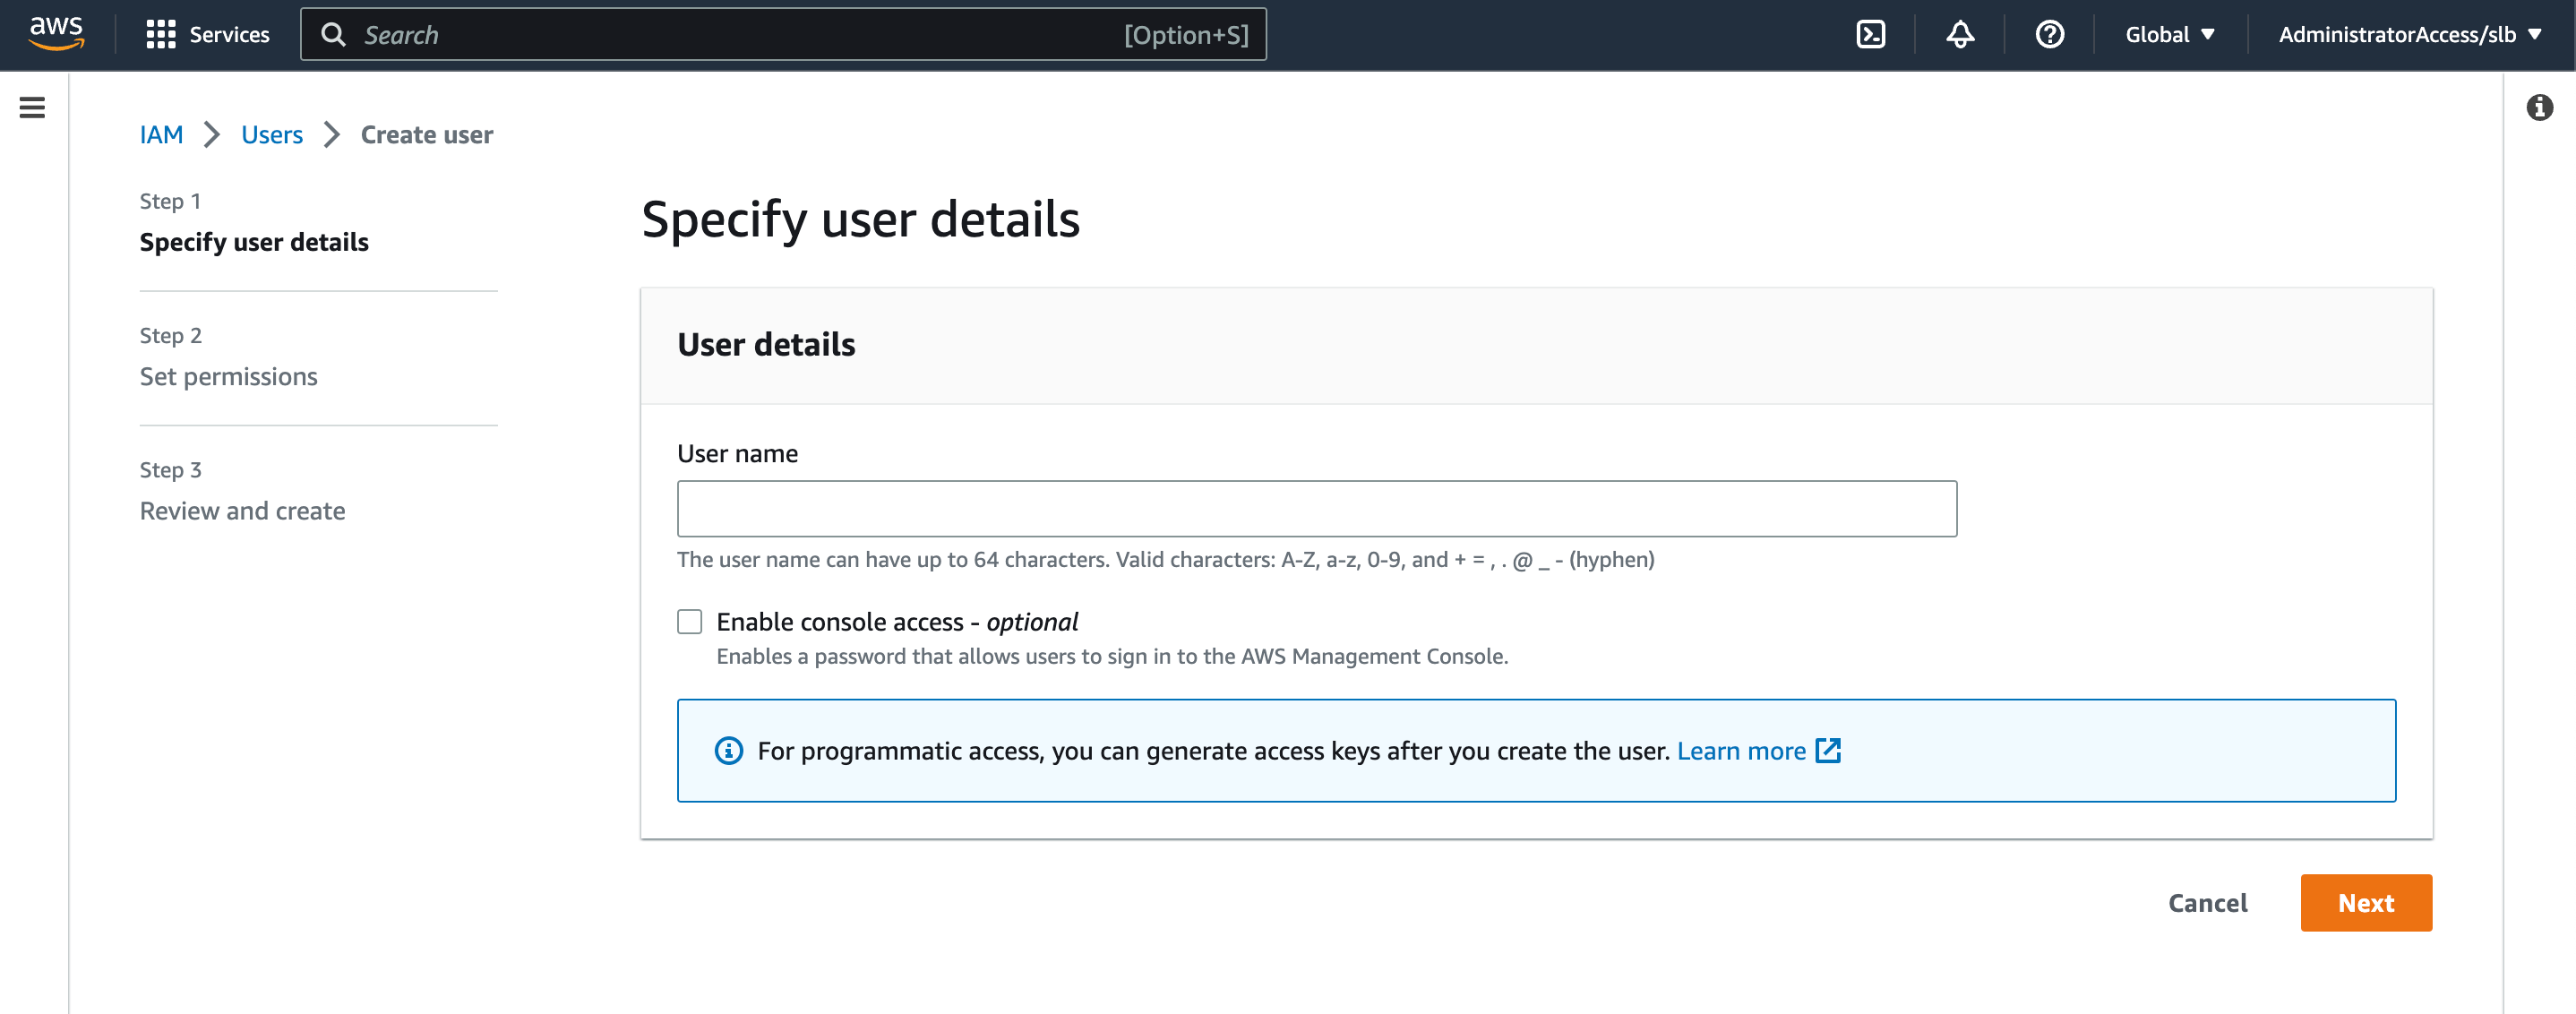
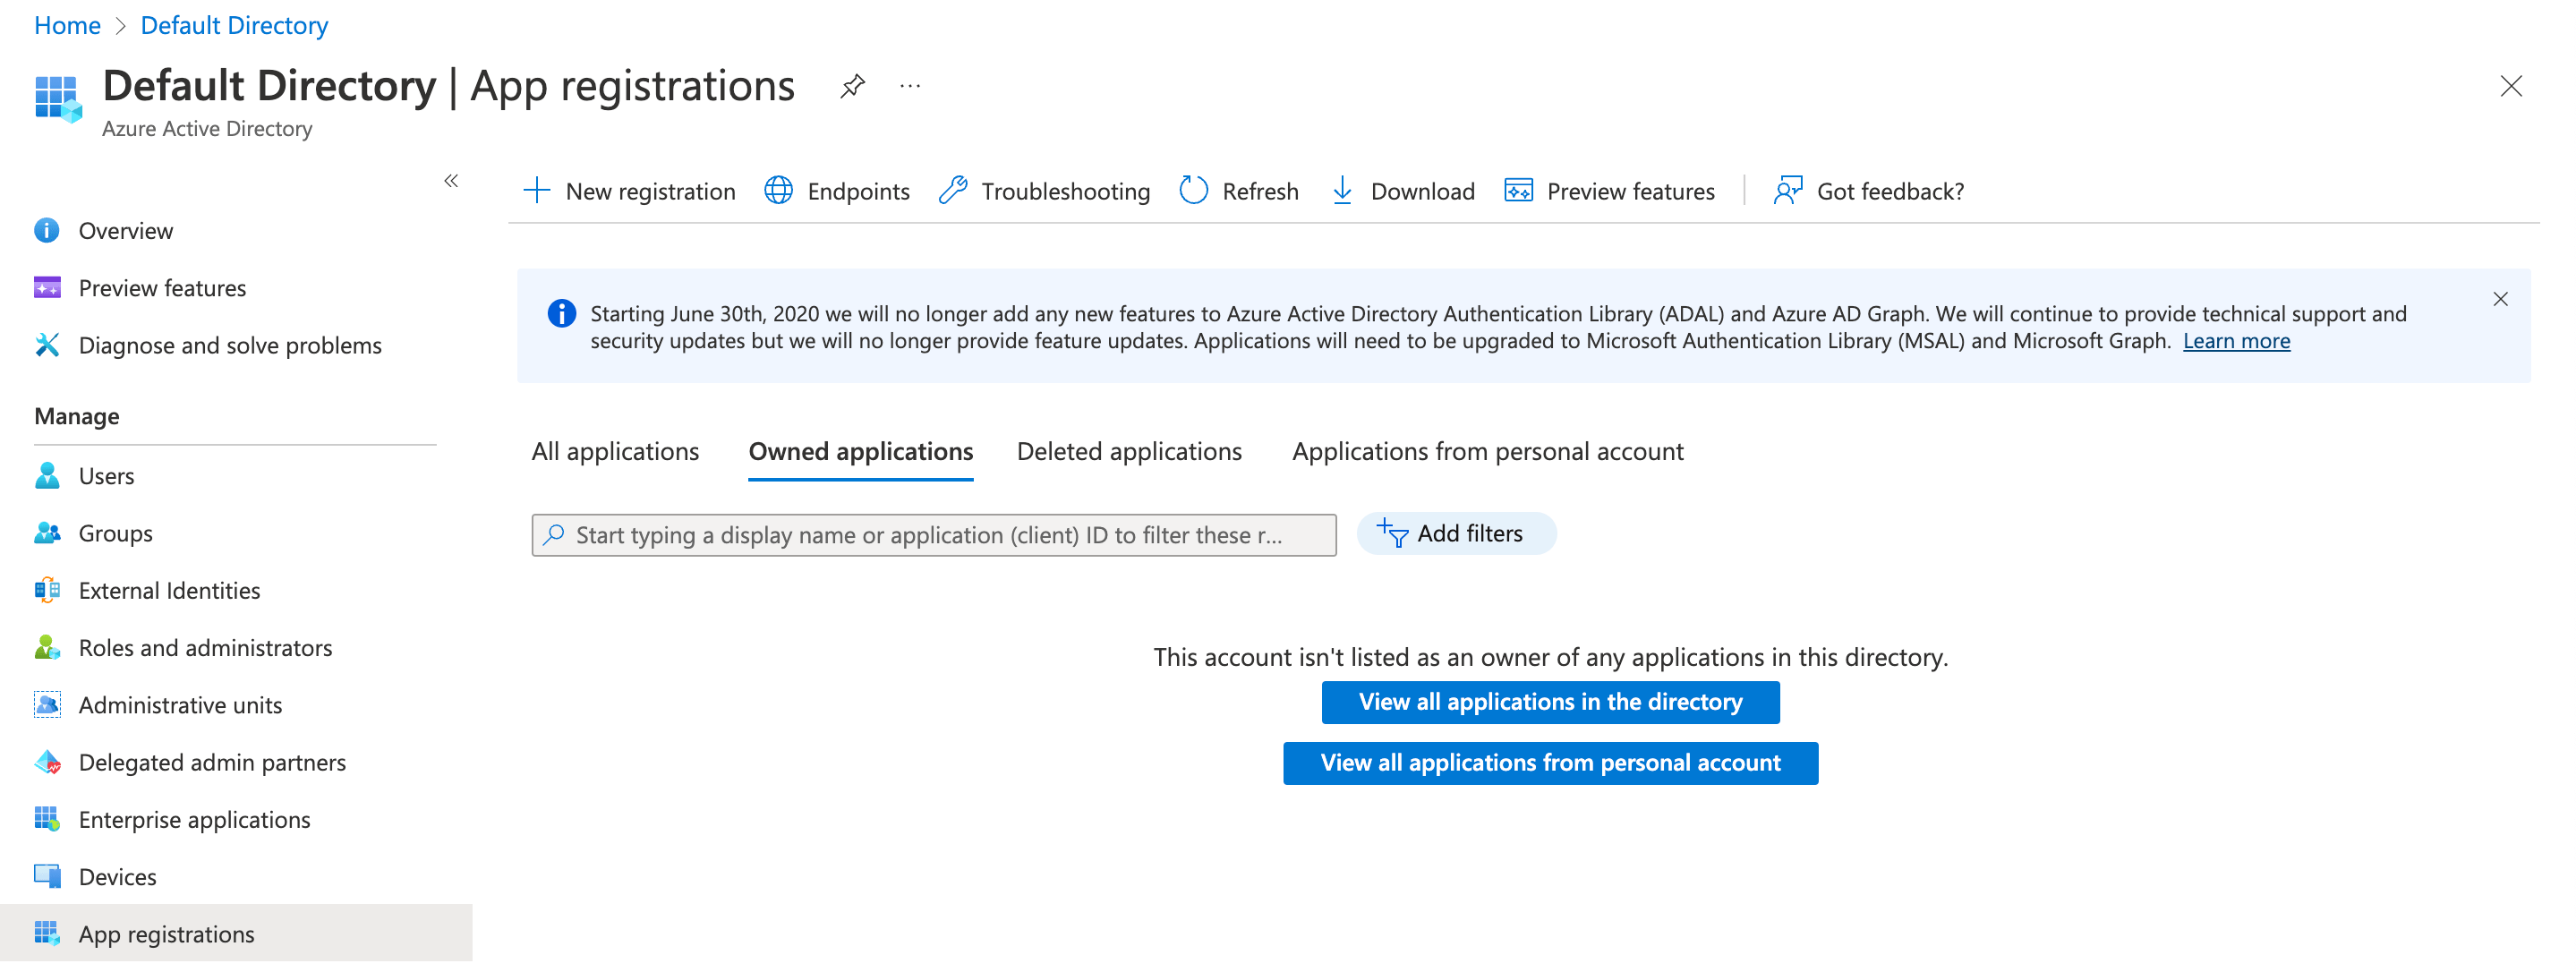
You'll then be prompted to OAuth with either GitHub or GitLab. We're just getting your permission to create a repository for Plural configuration on your behalf. Give your repository a name, being sure to select the right organization or individual account in the first box. Your repository name must be unique within your account, which will be checked before you can advance to the next step.
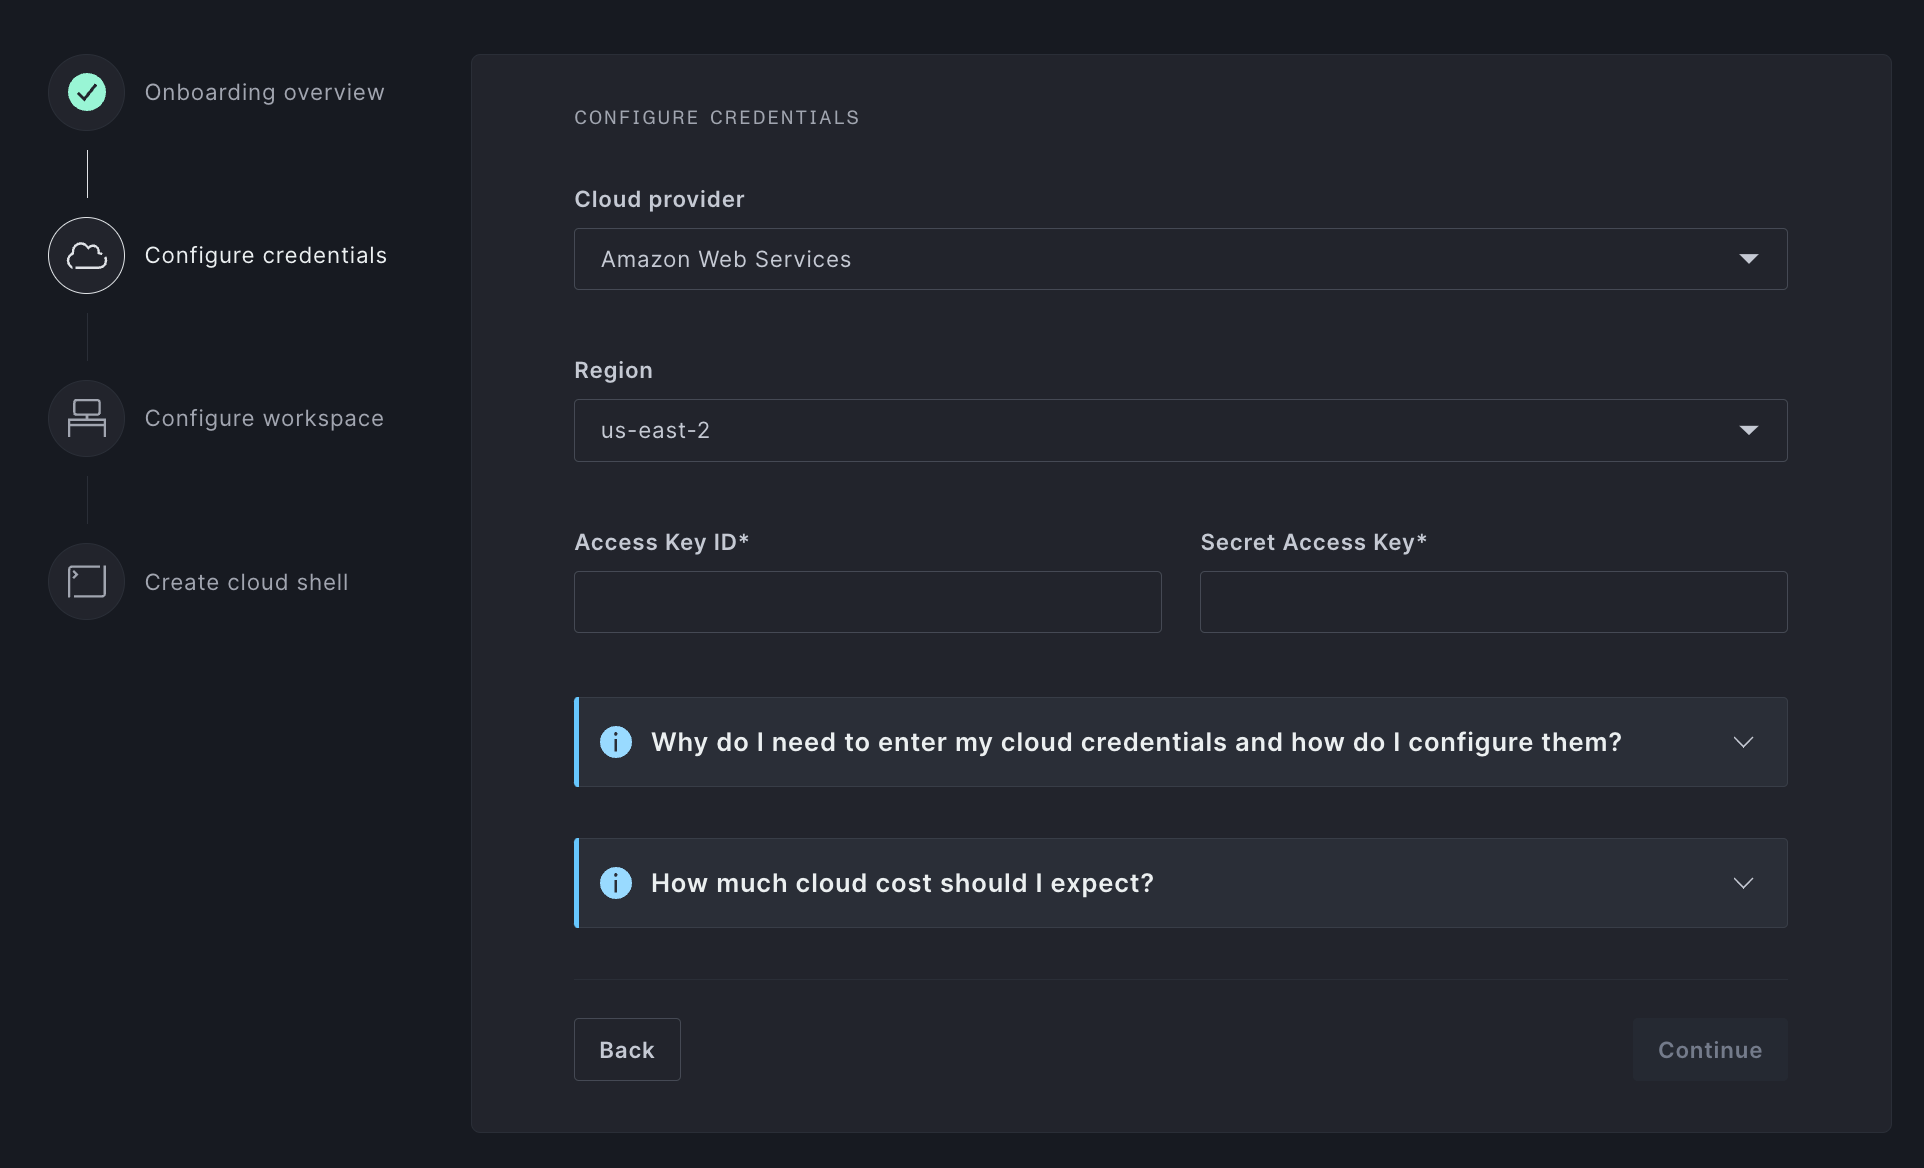
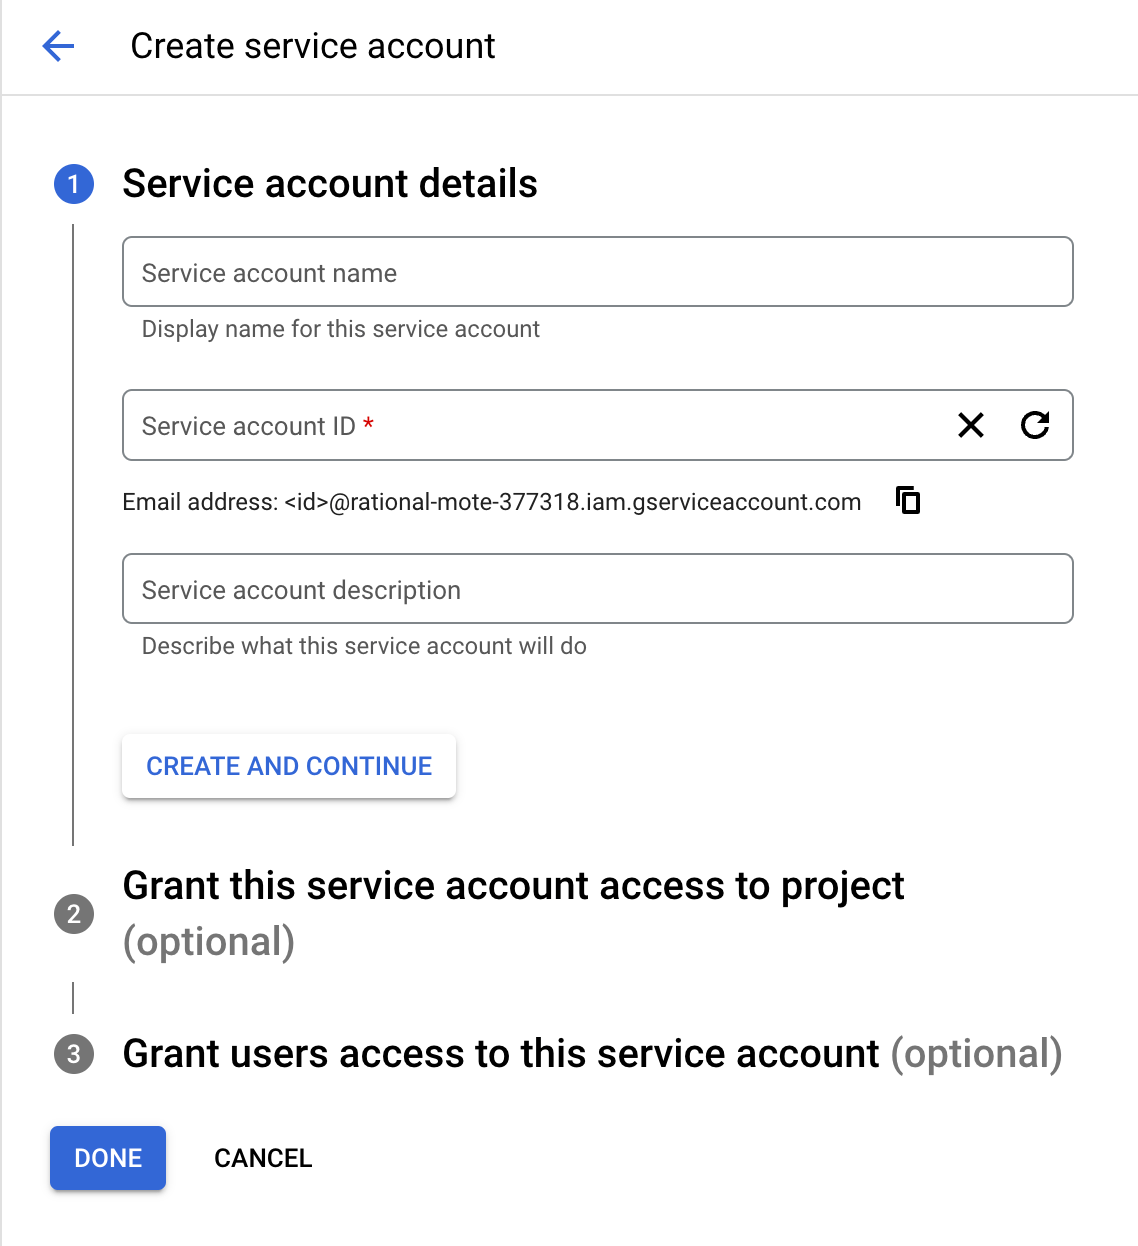
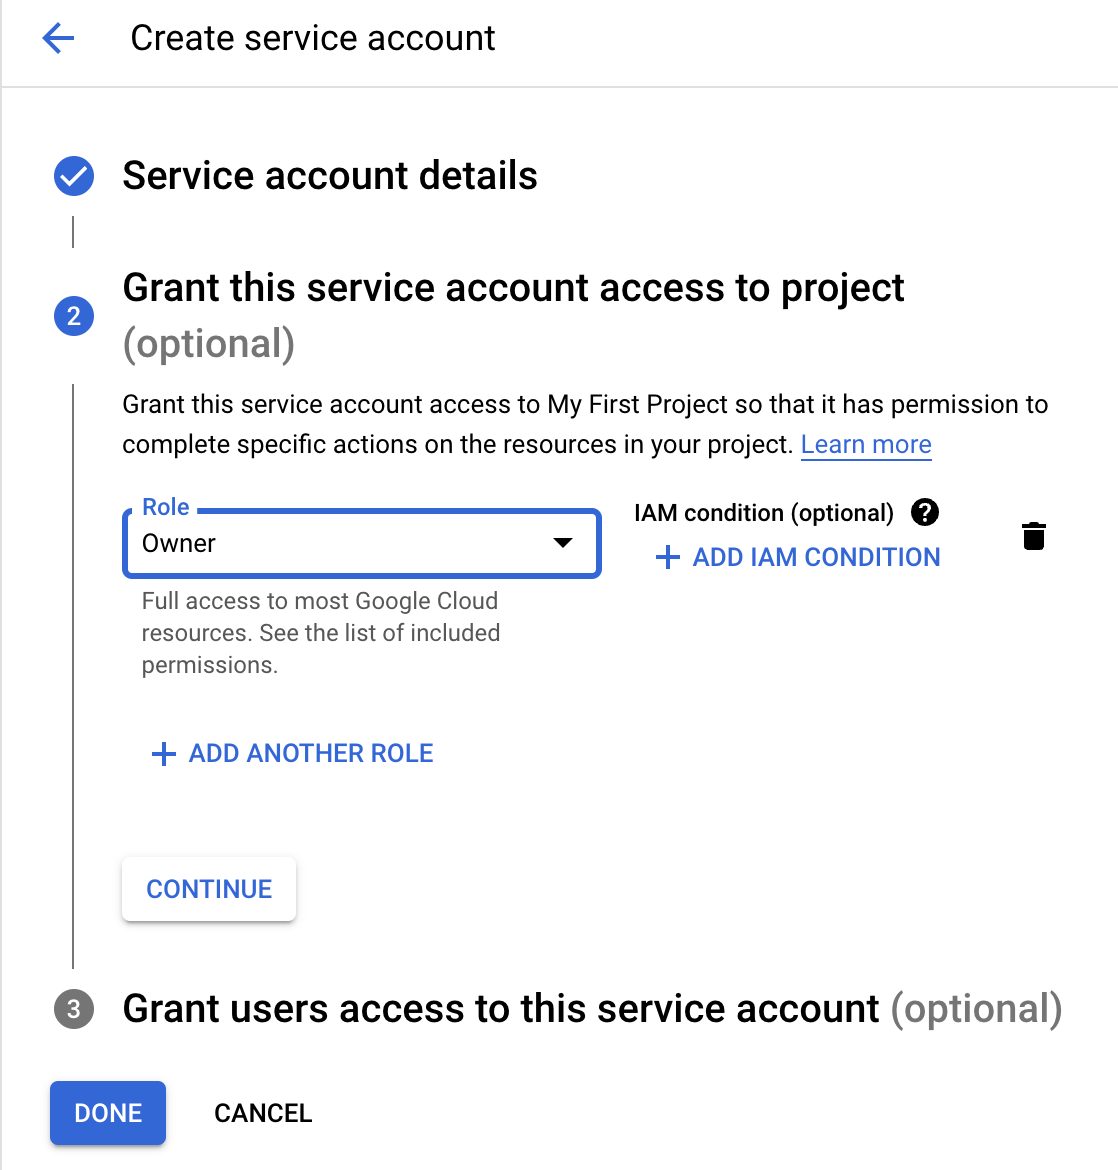
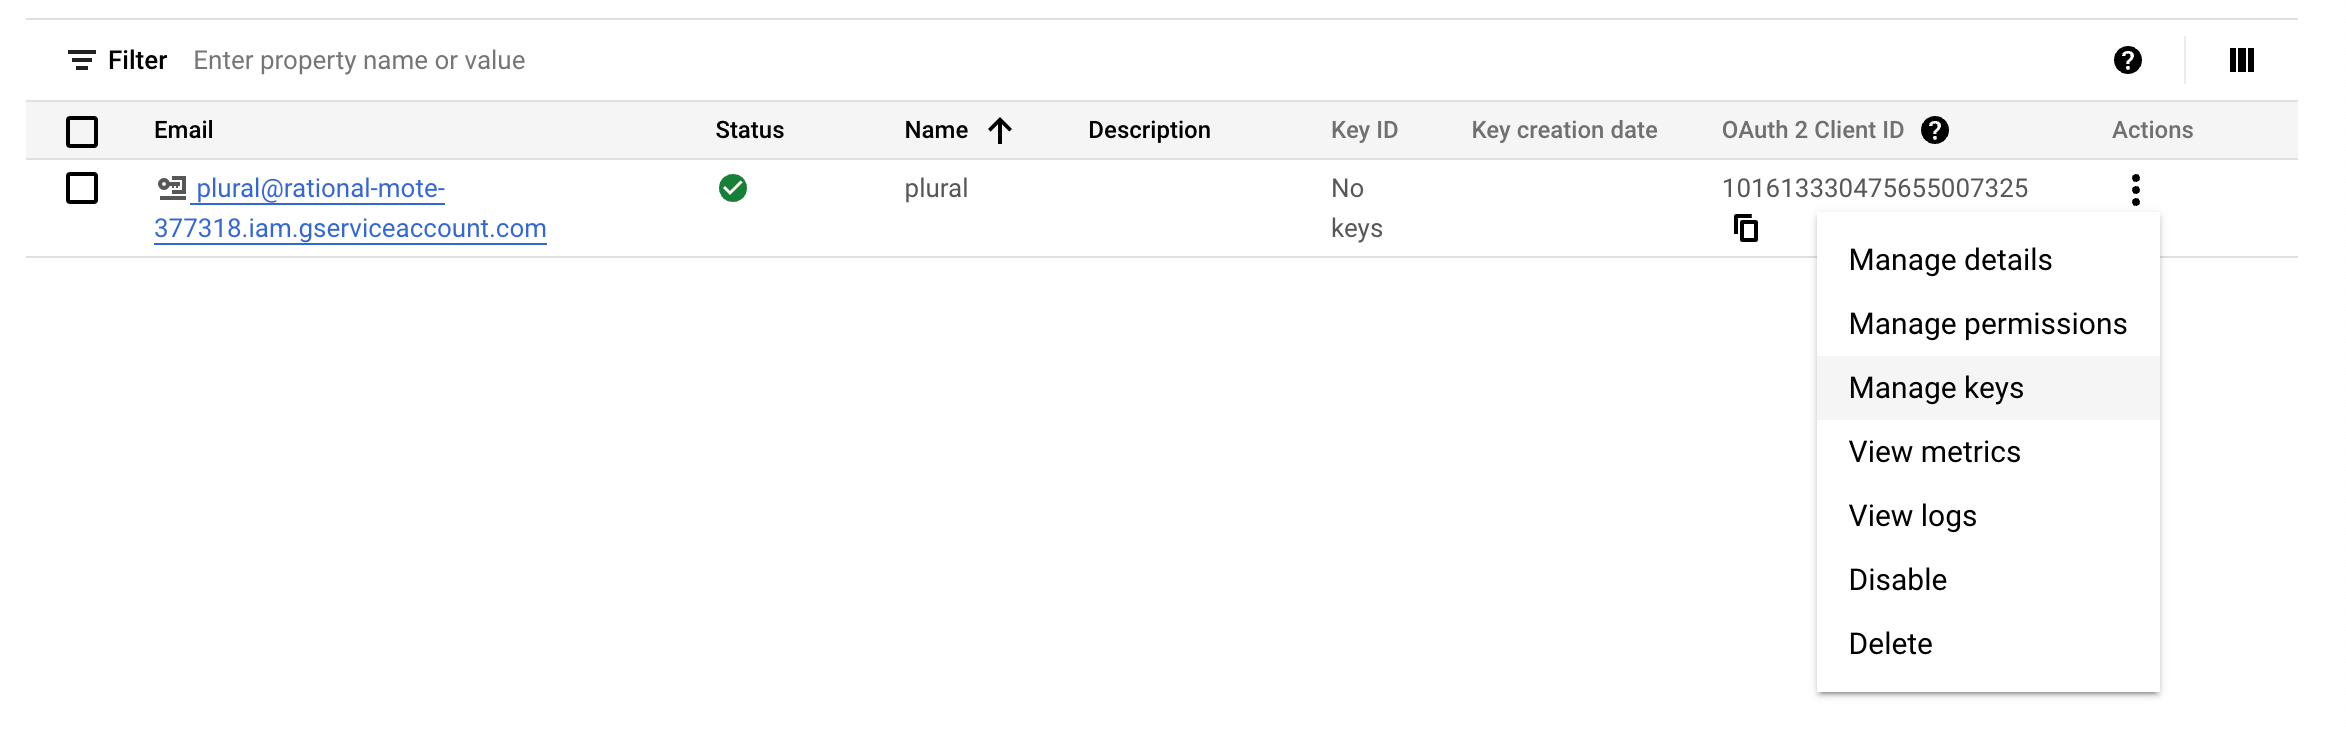
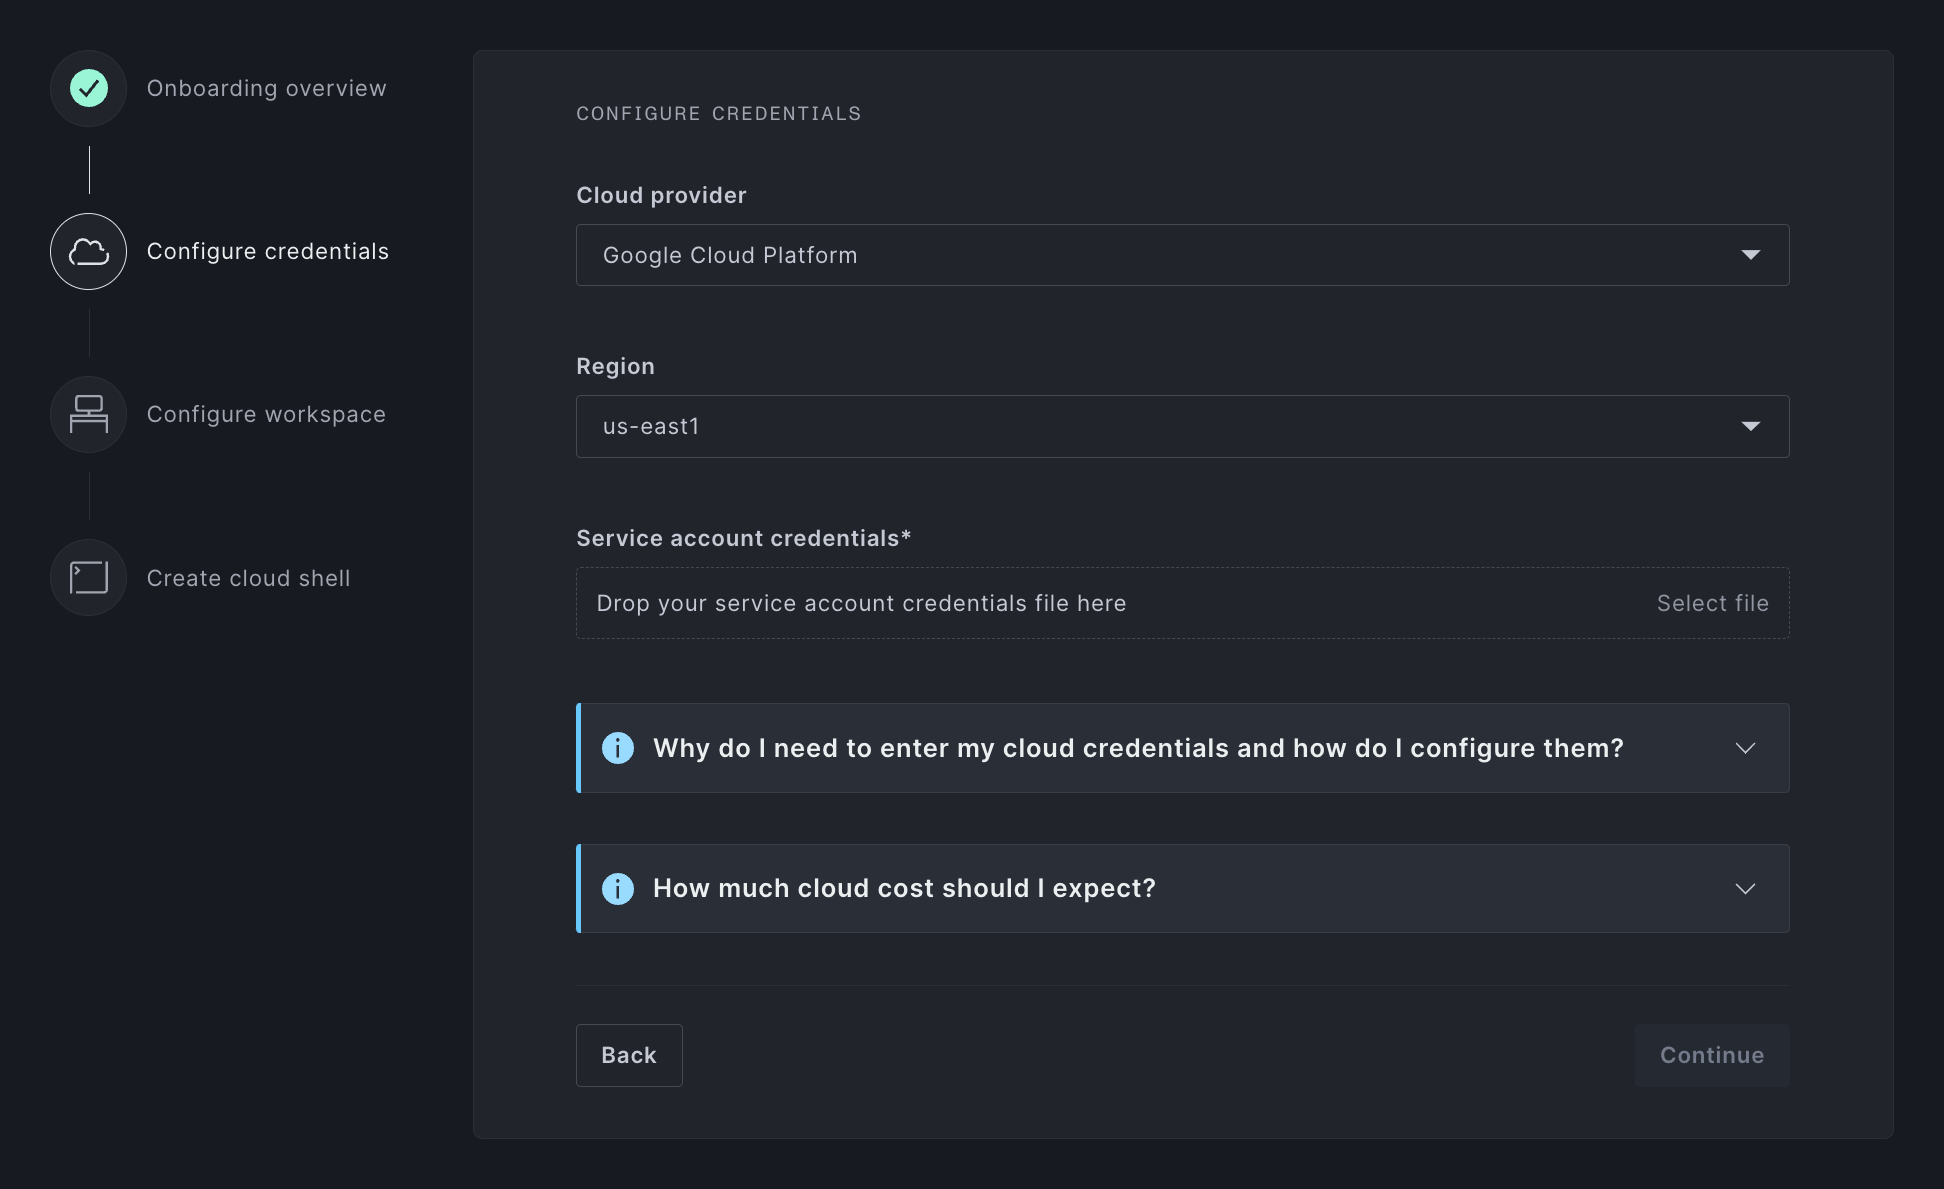
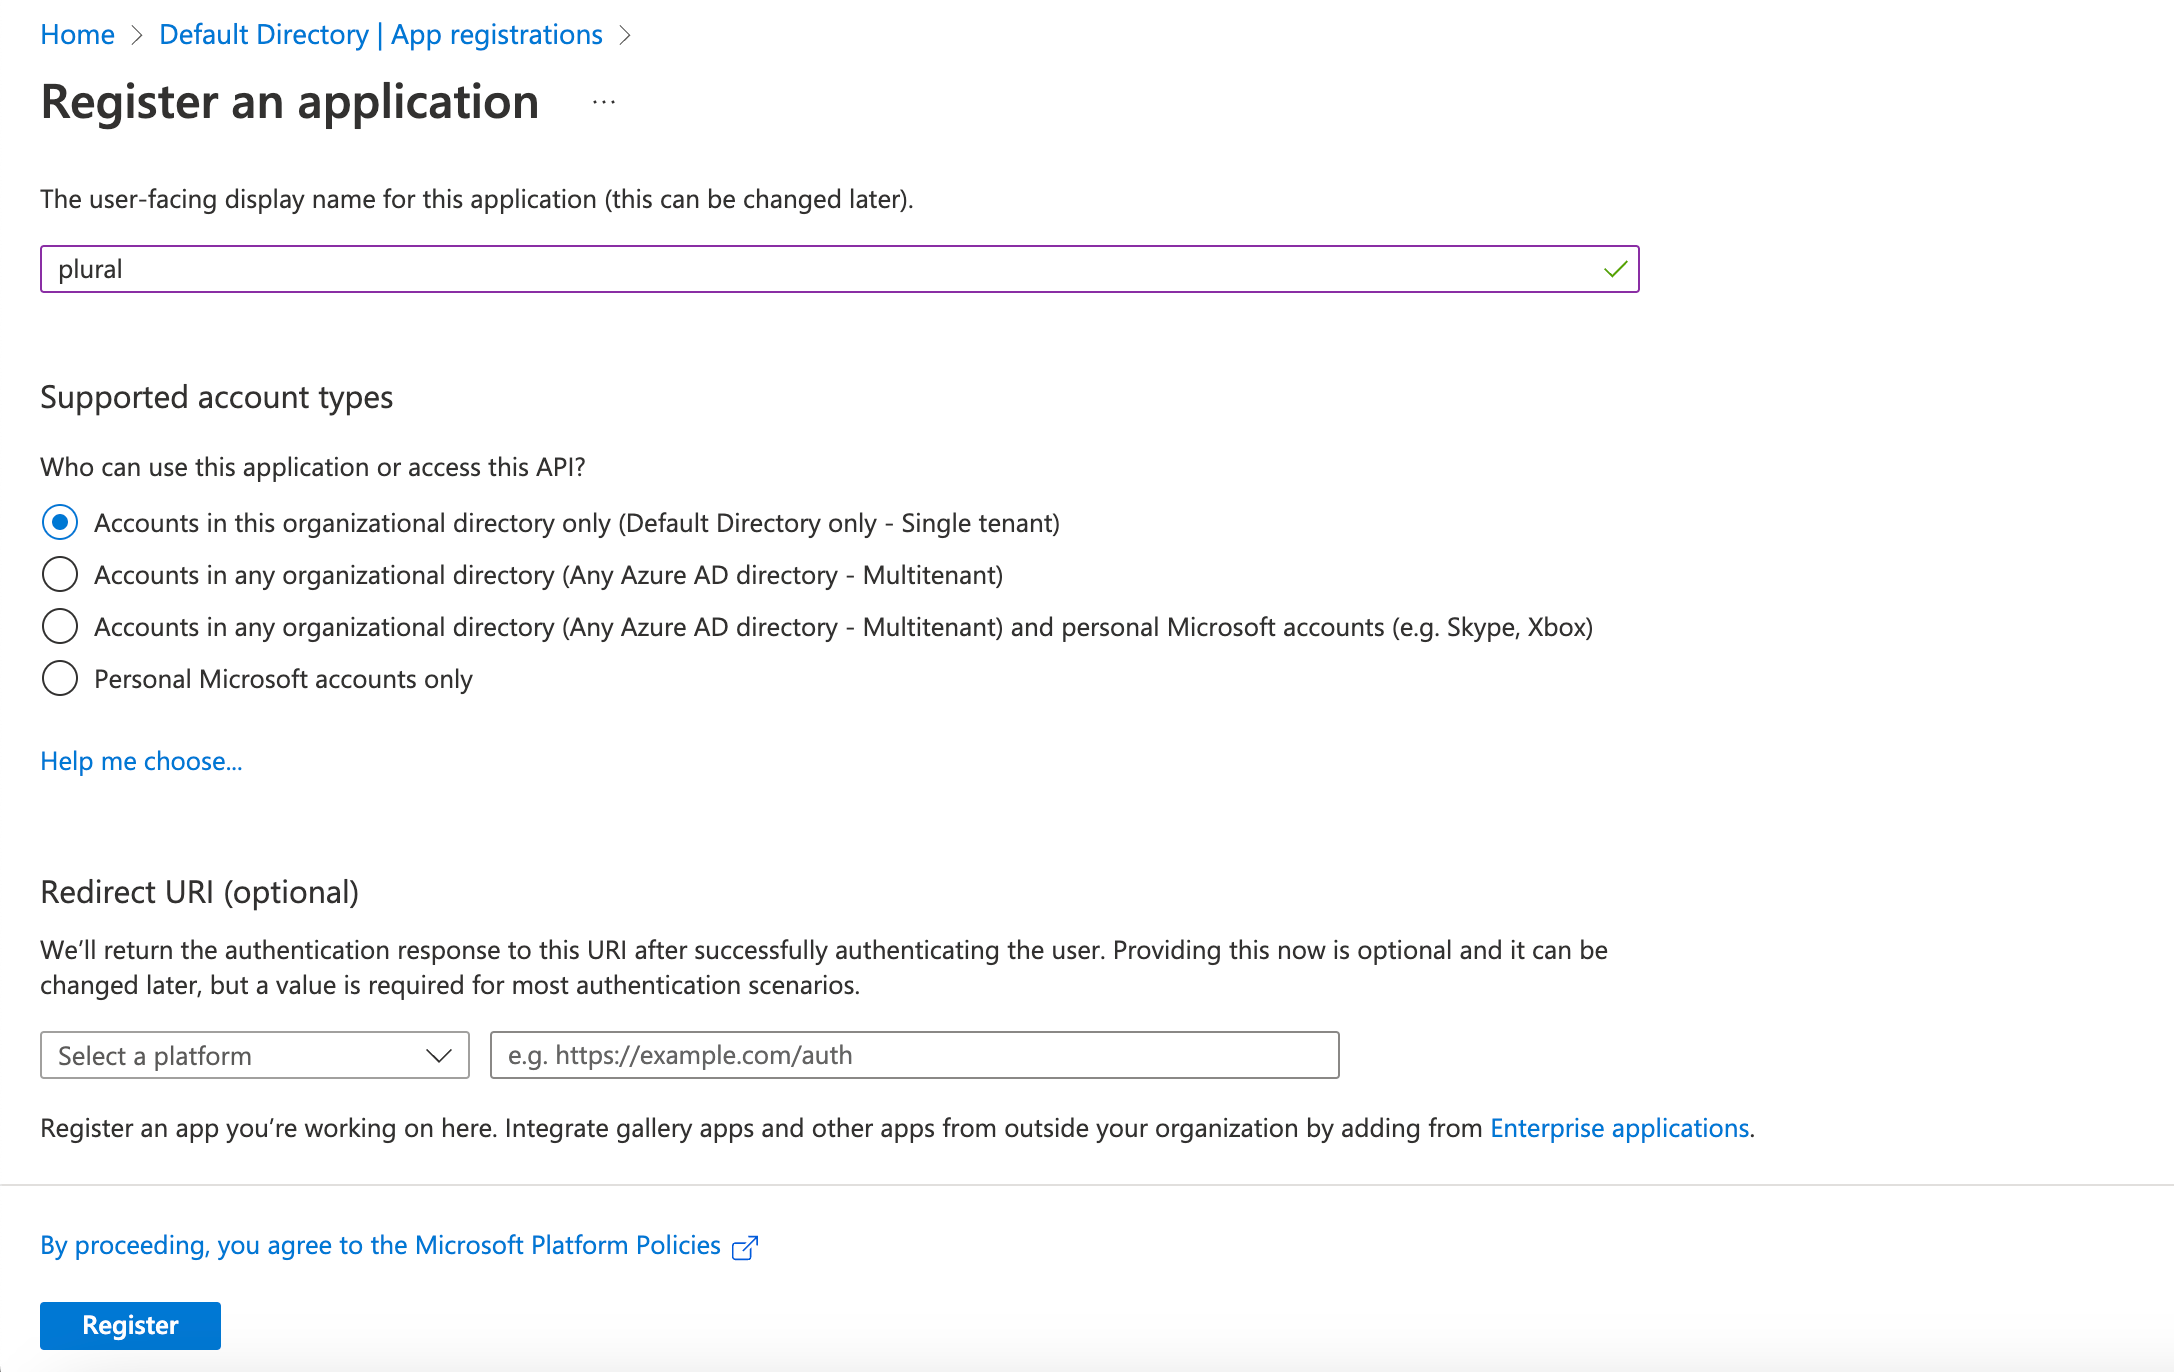
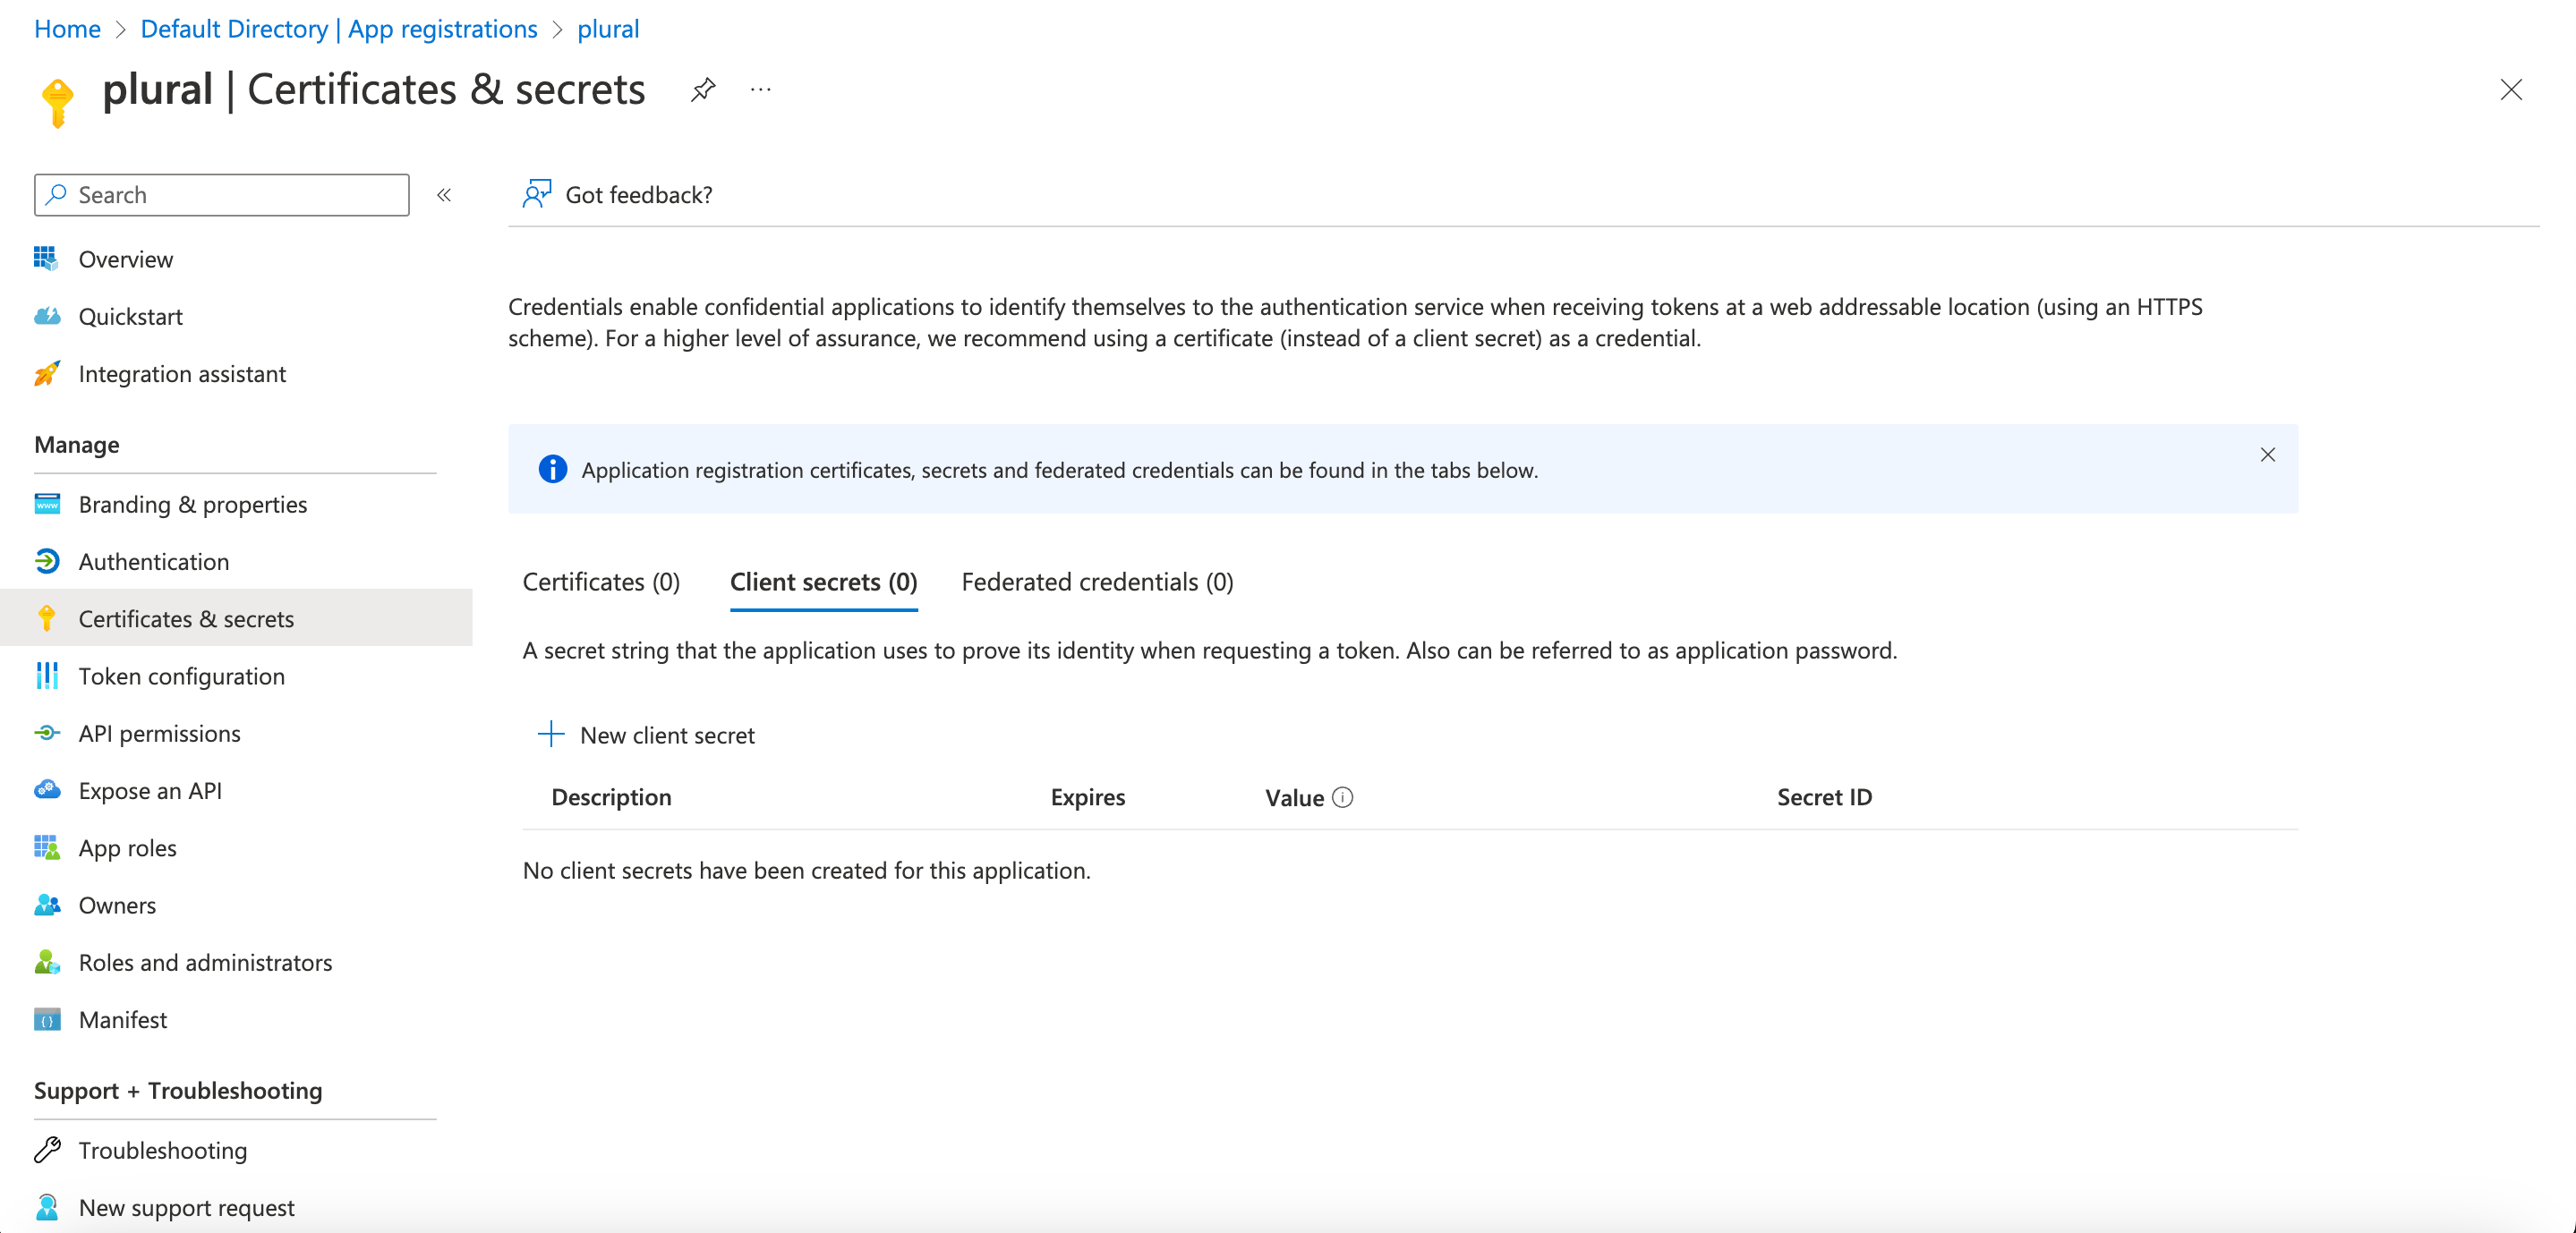
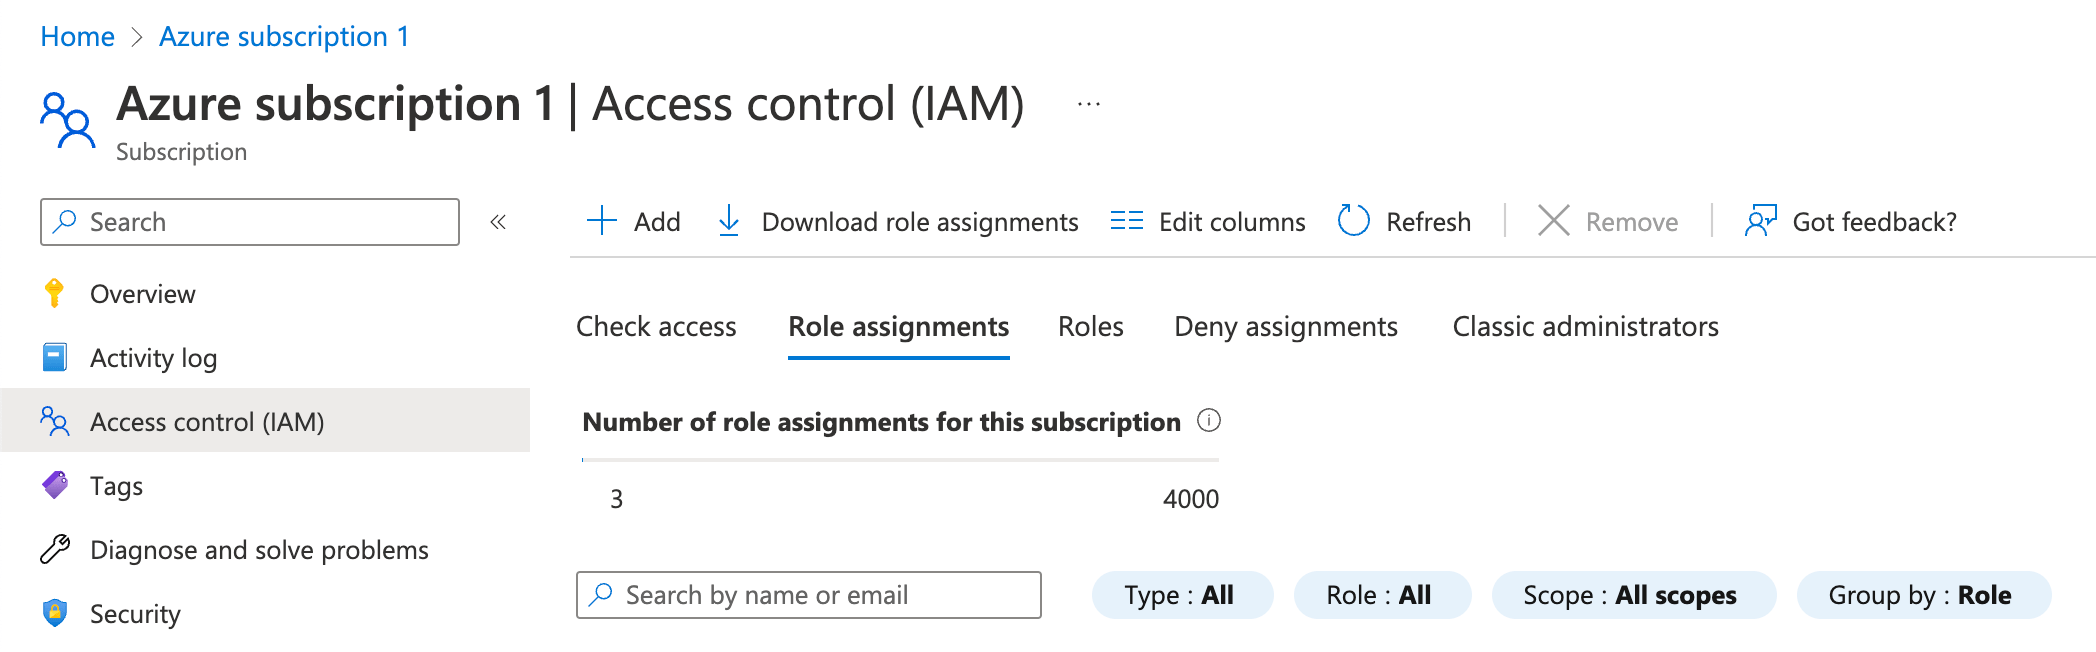
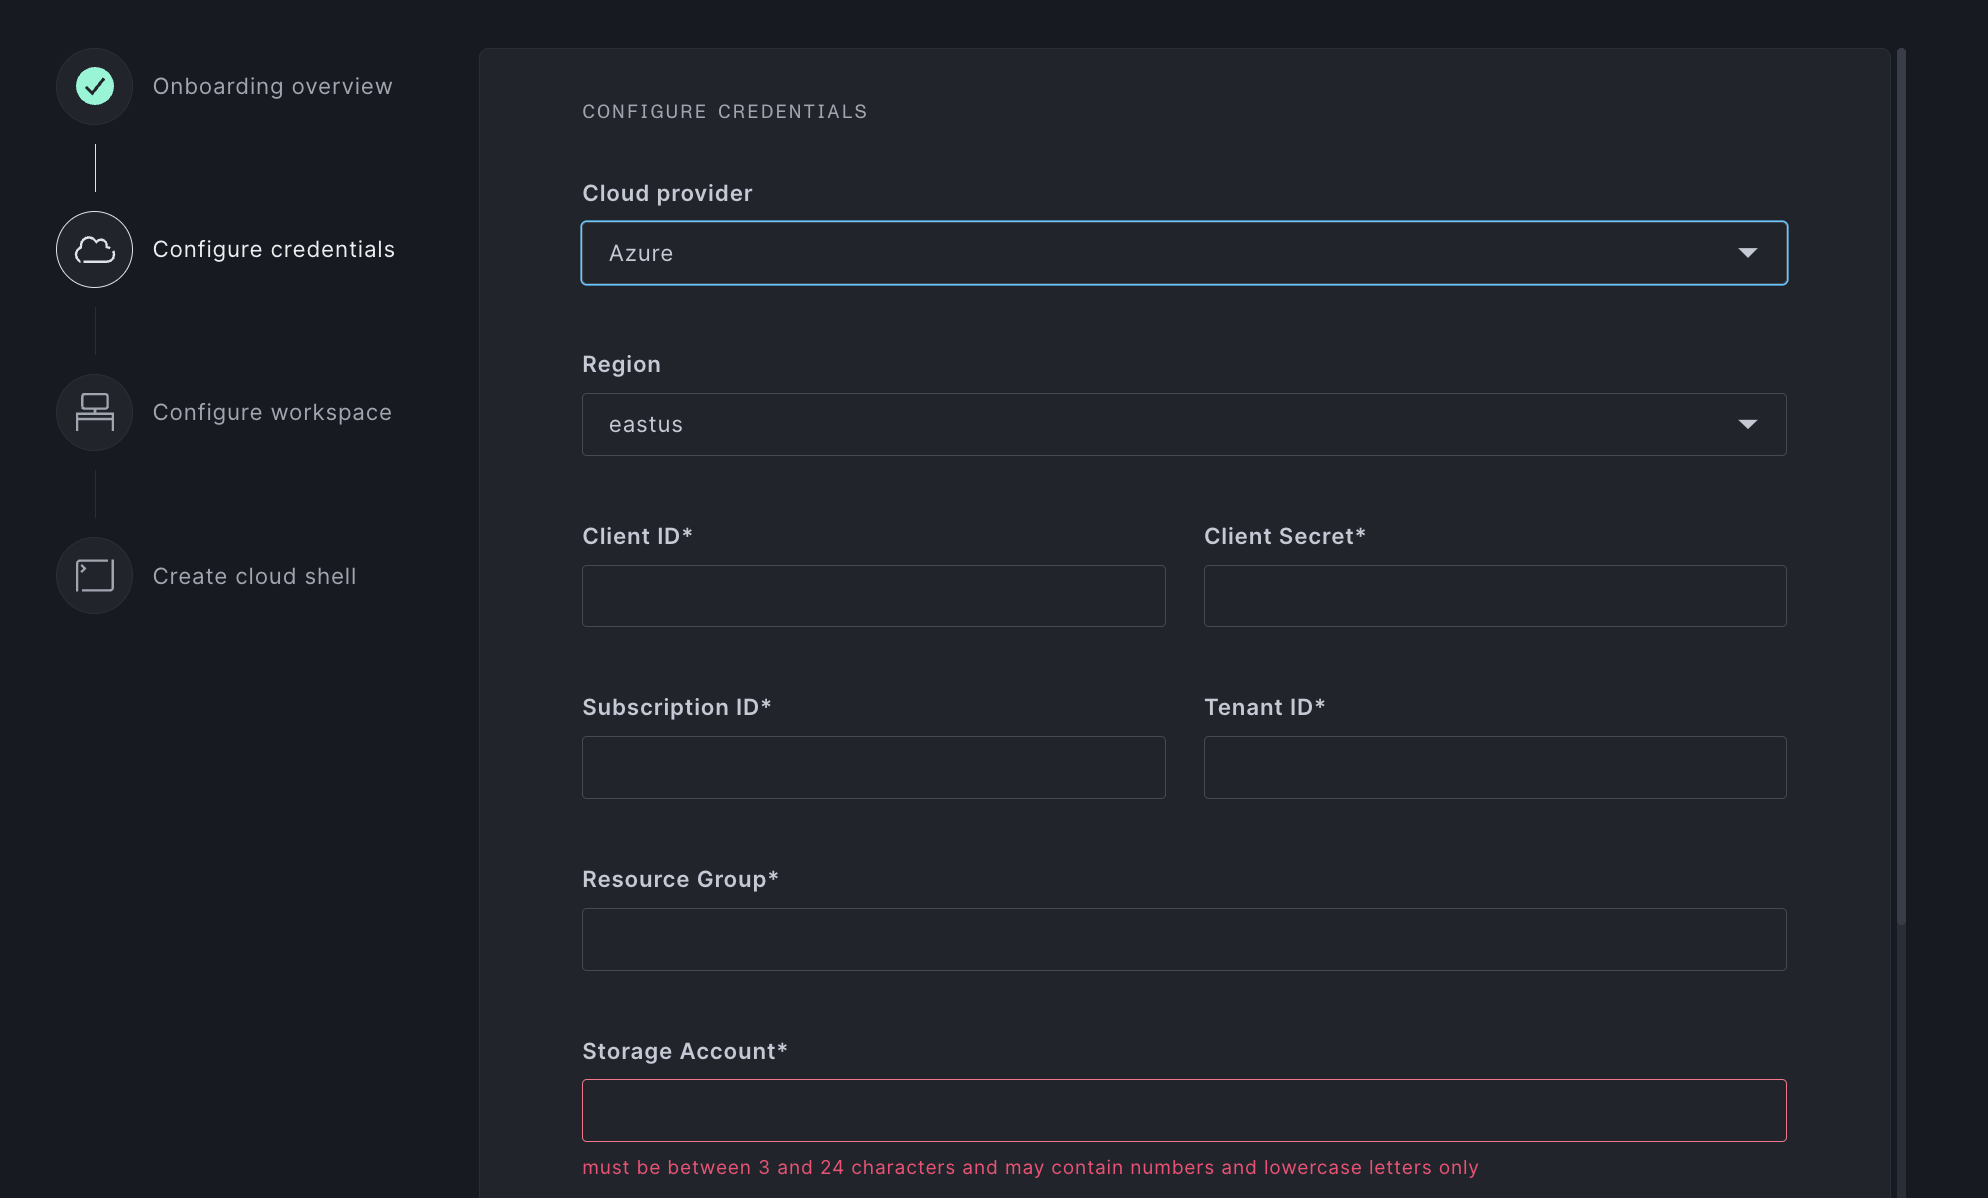
Plural can be set up on AWS, GCP, or Azure. You can provide your credentials in the following screen:
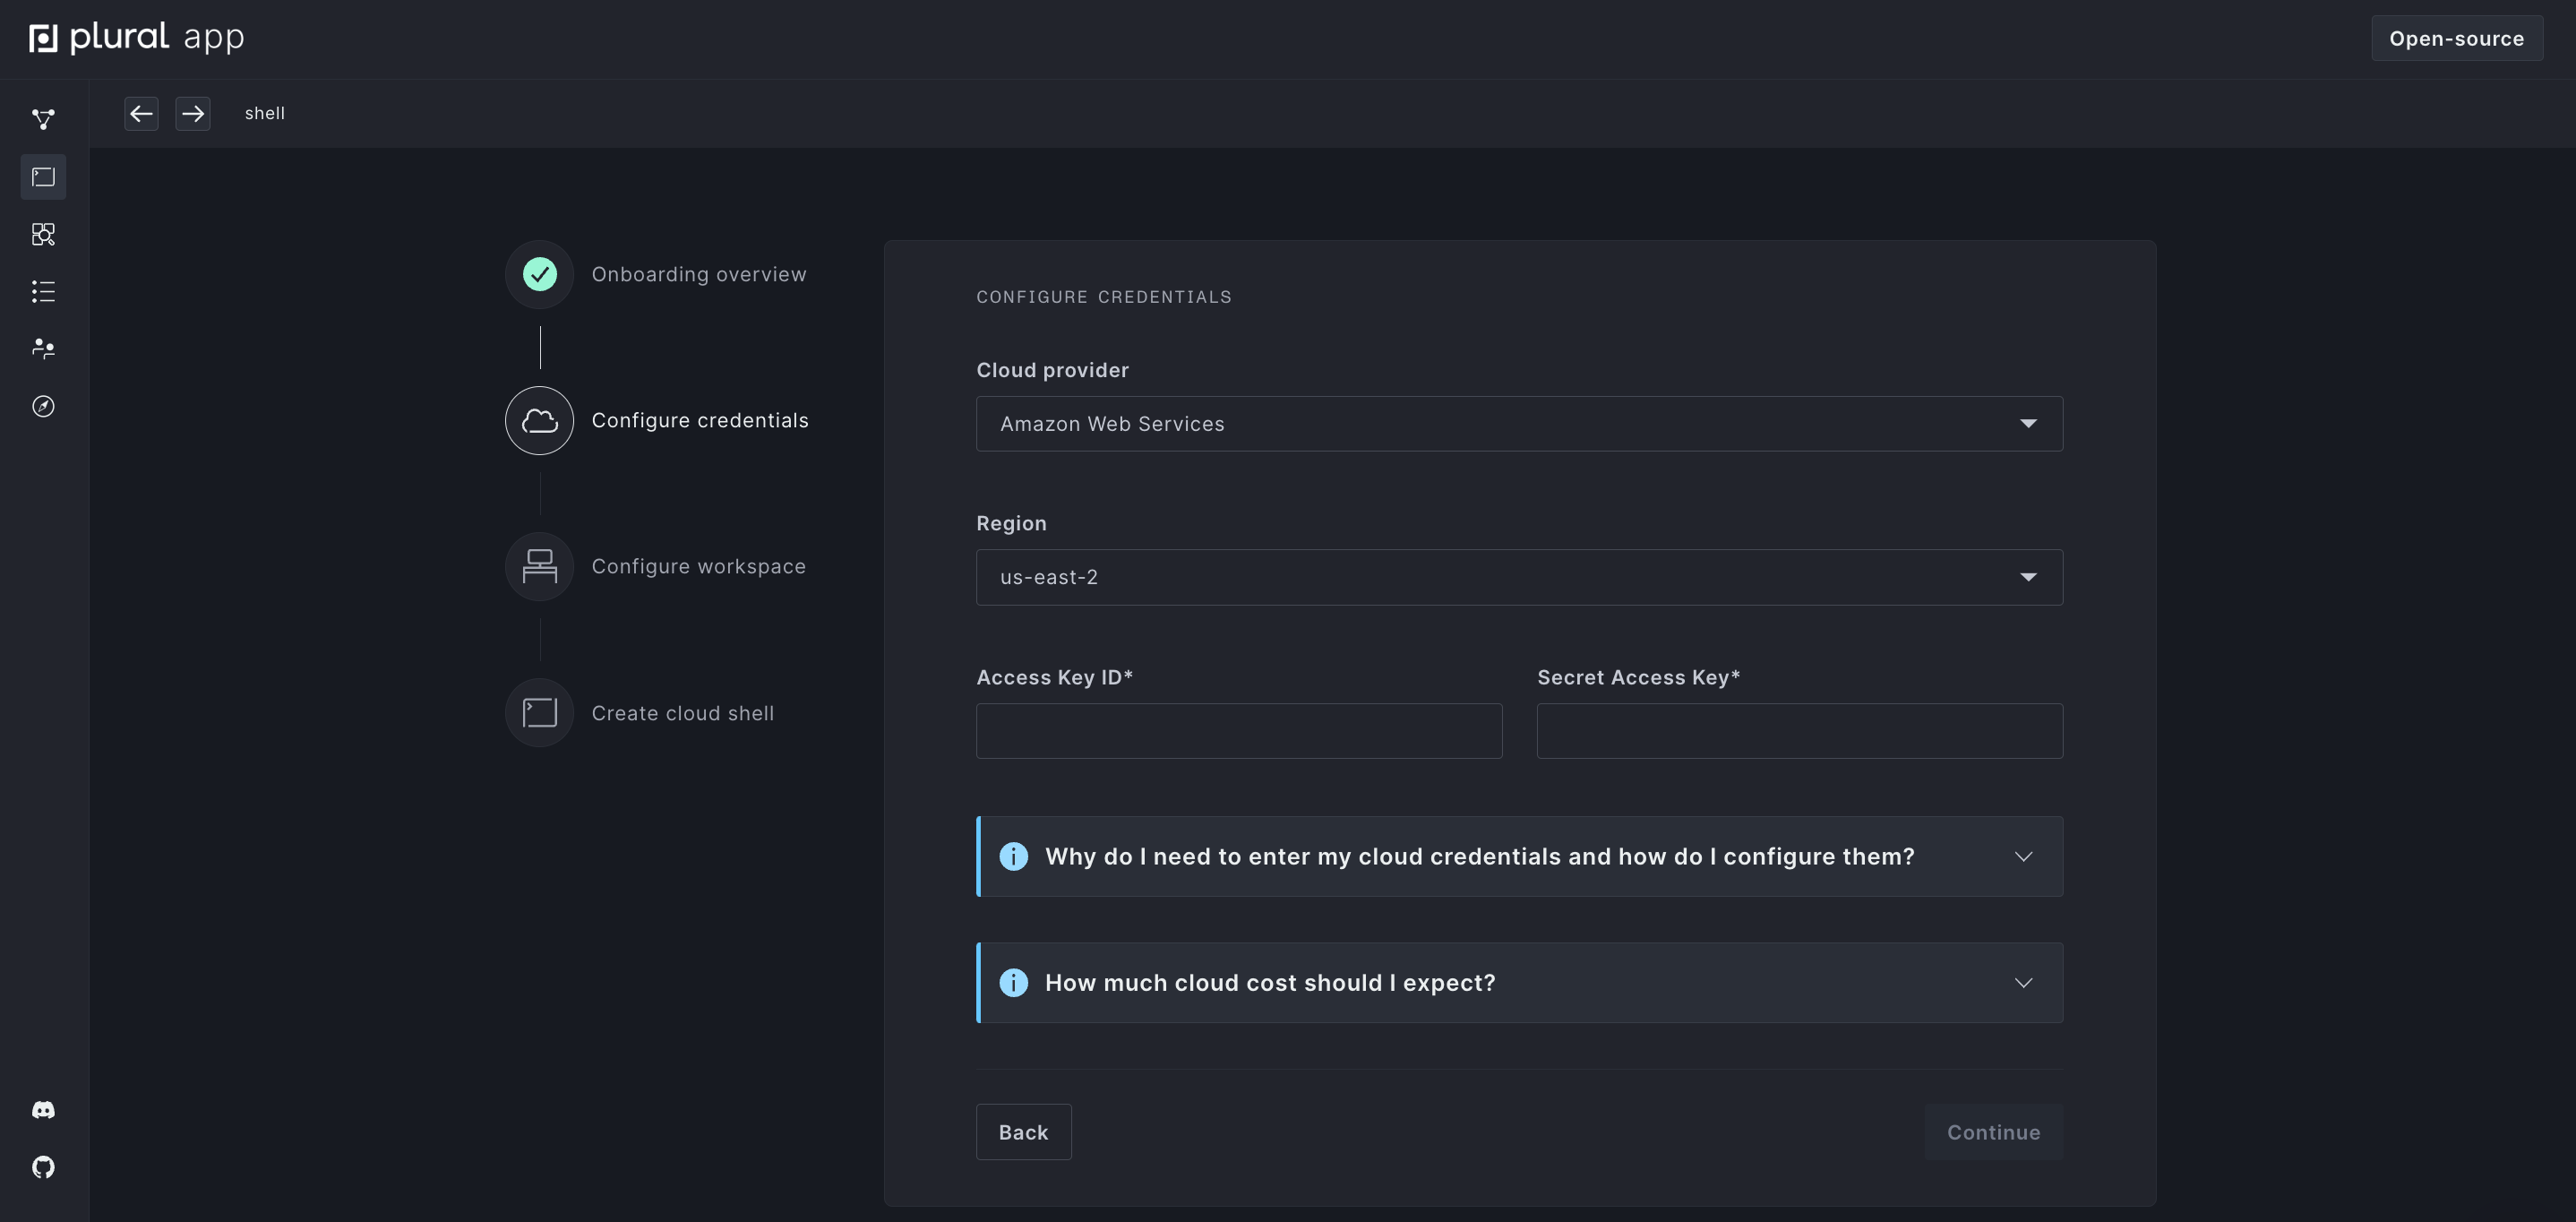
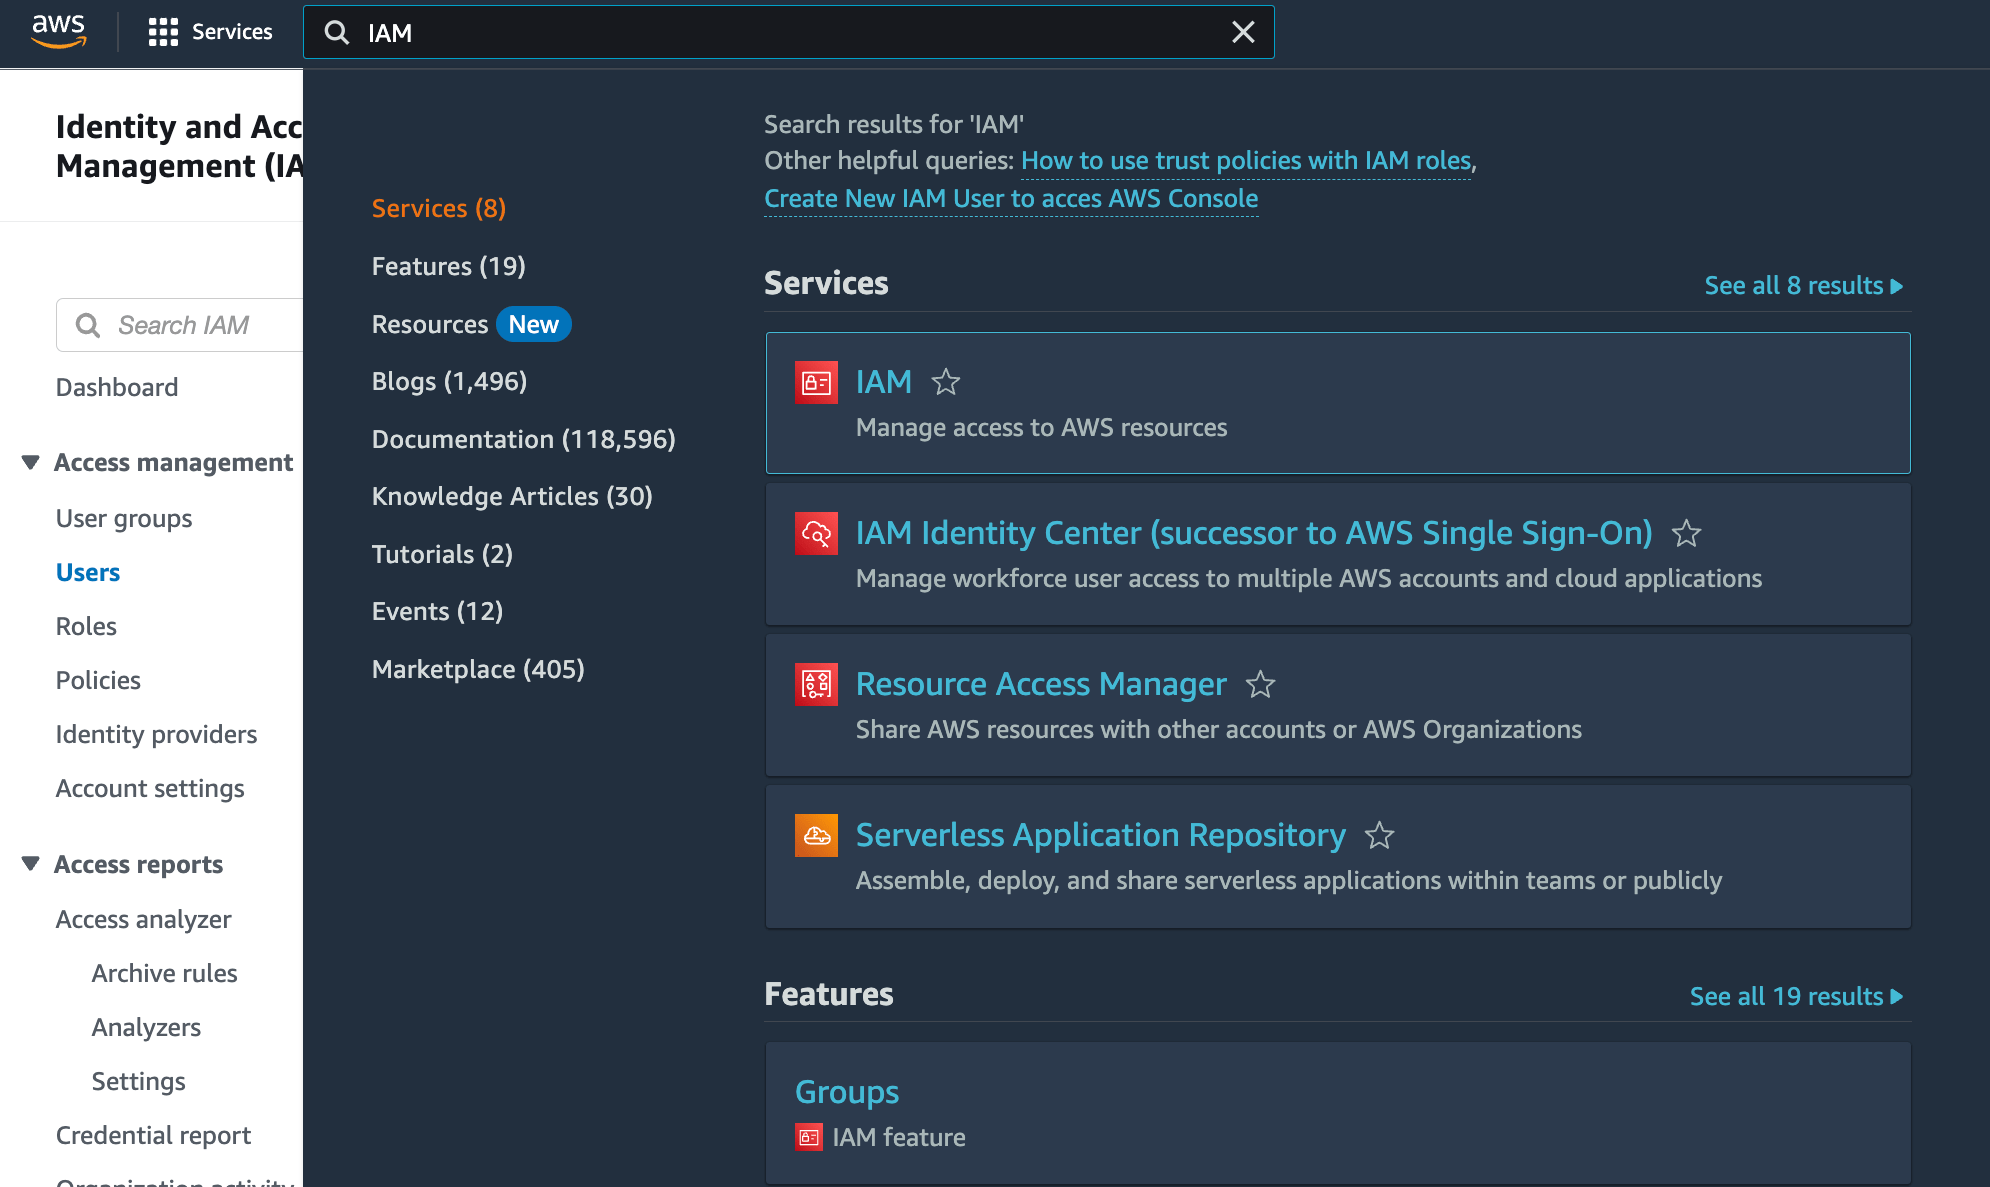
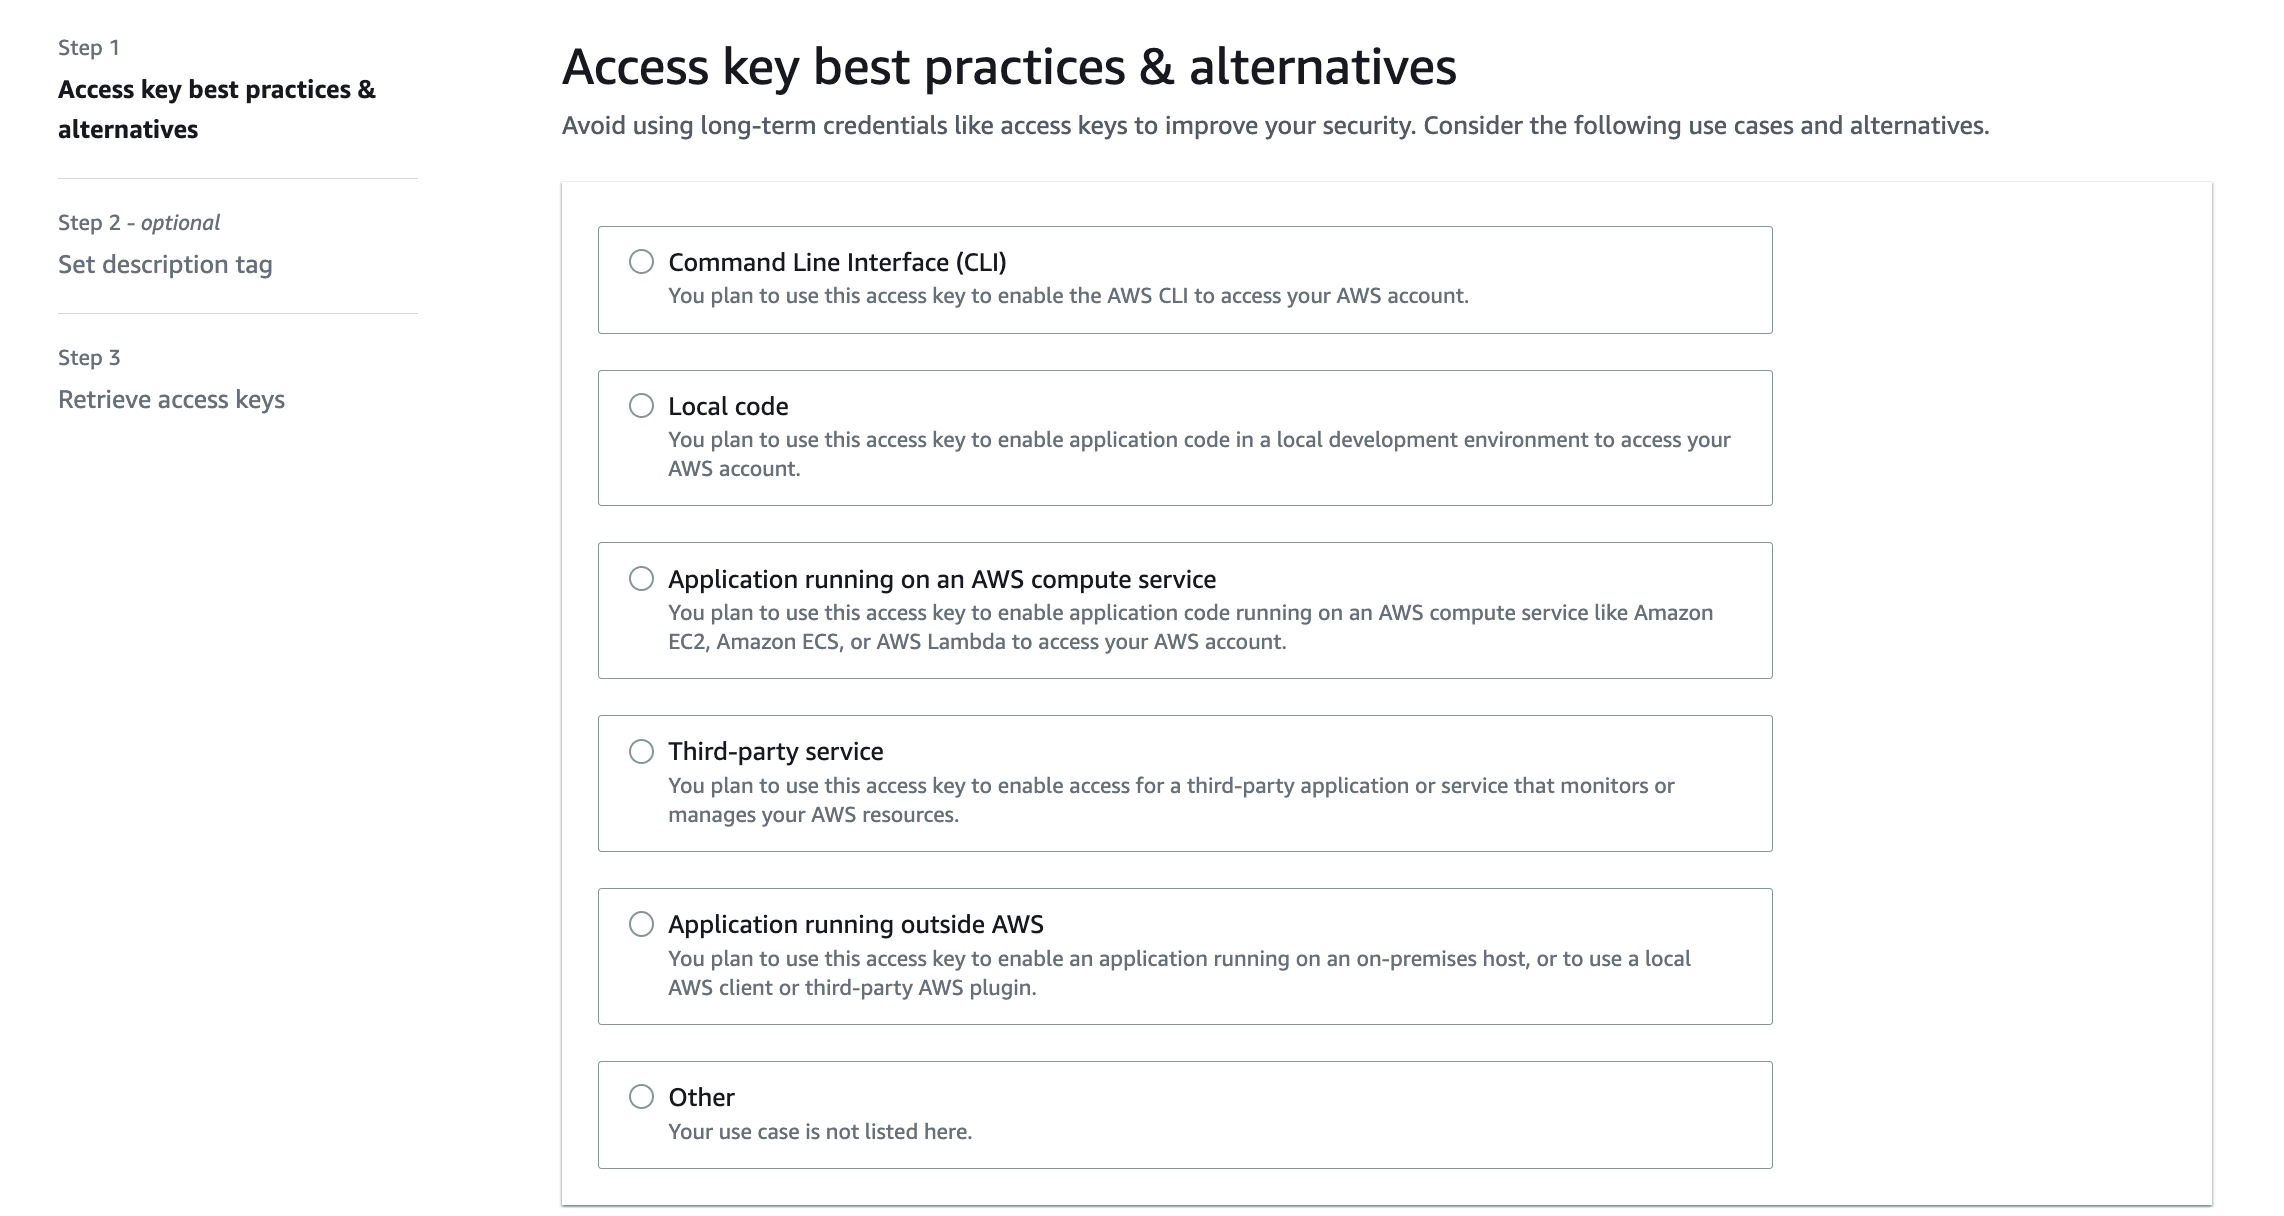
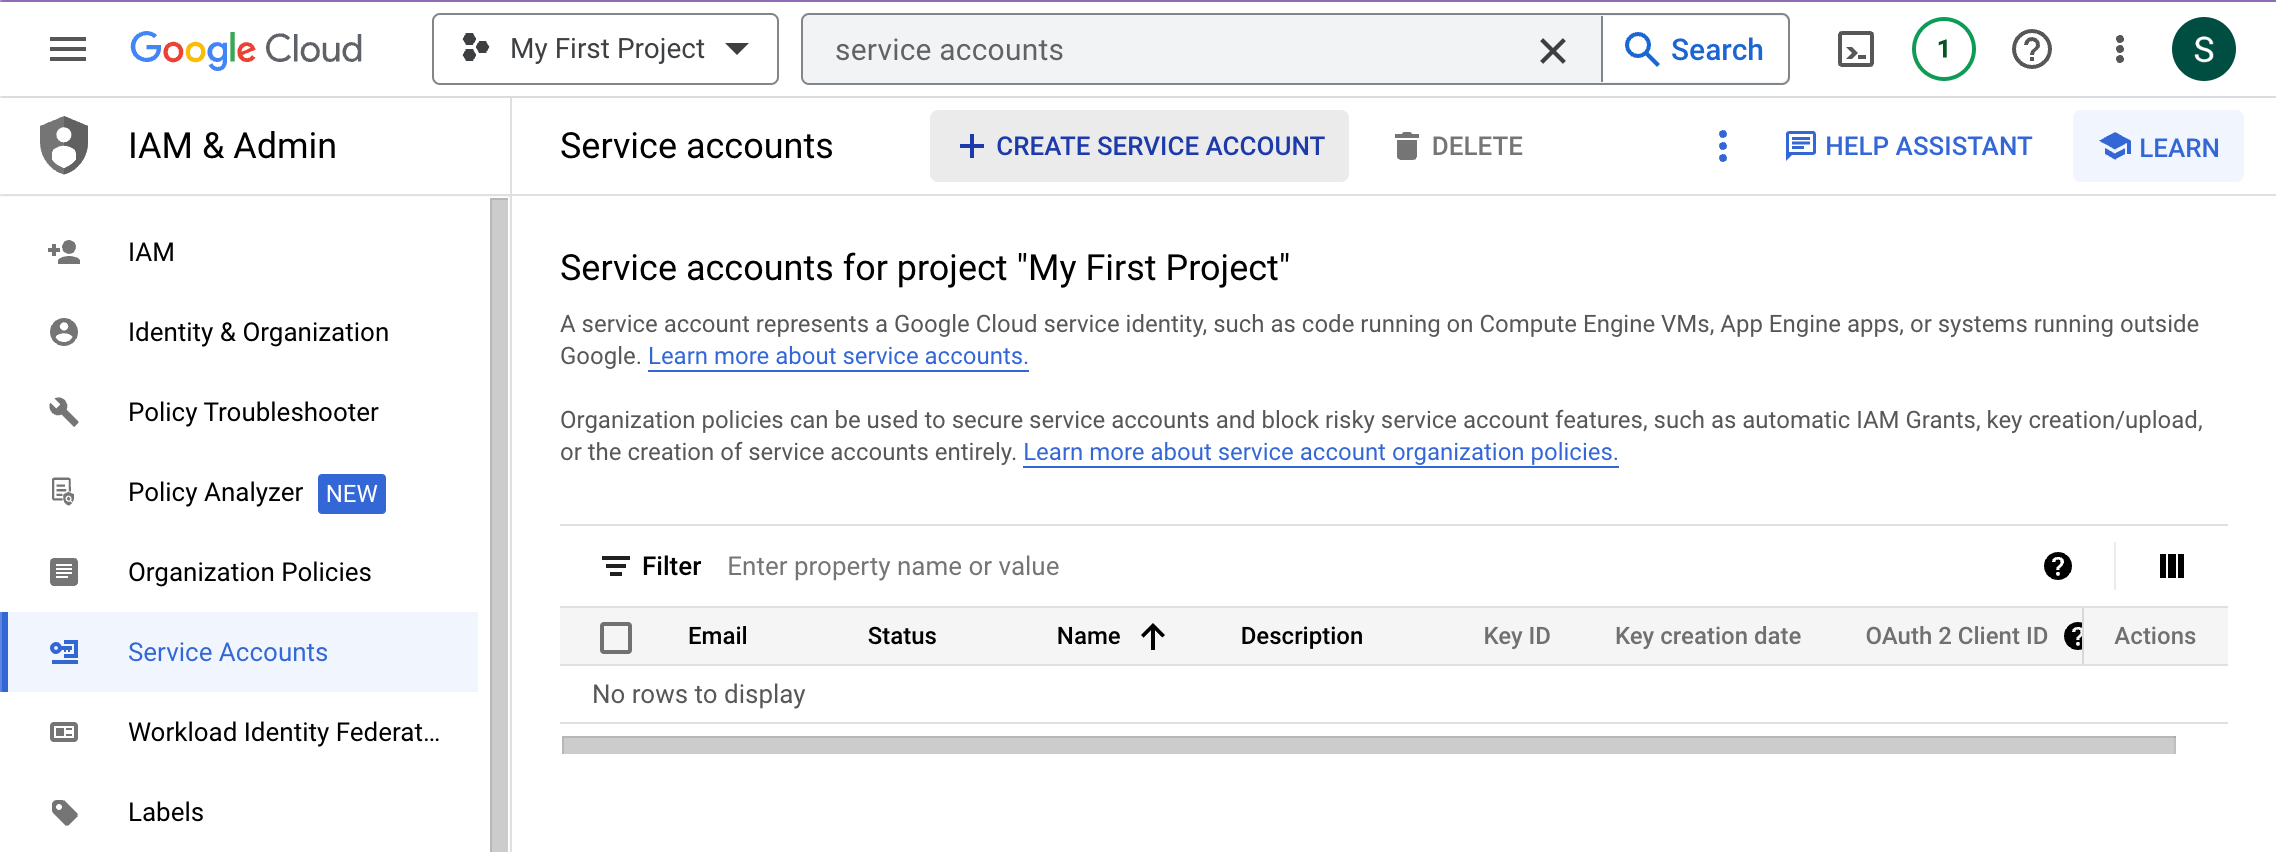
Each cloud provider requires a slightly different set of credentials. Follow the steps below to generate the credentials for your provider.


Set up a Workspace
We'll now start setting up your Kubernetes cluster configuration. Here's a guide to the config:
cluster: The name of your Kubernetes cluster. Name this based on what you're planning to run.
bucket prefix: We provision S3 buckets for storing logs and state. Enter any string to help us uniquely name your buckets.
subdomain: We'll provision a subdomain for you to host your cluster and applications under. For example, if you choose nintendo as your subdomain and spin up an instance of Airflow, it will be available at airflow.nintendo.onplural.sh.
You should hit the following verification screen afterward. Hit Create once you're ready to go!
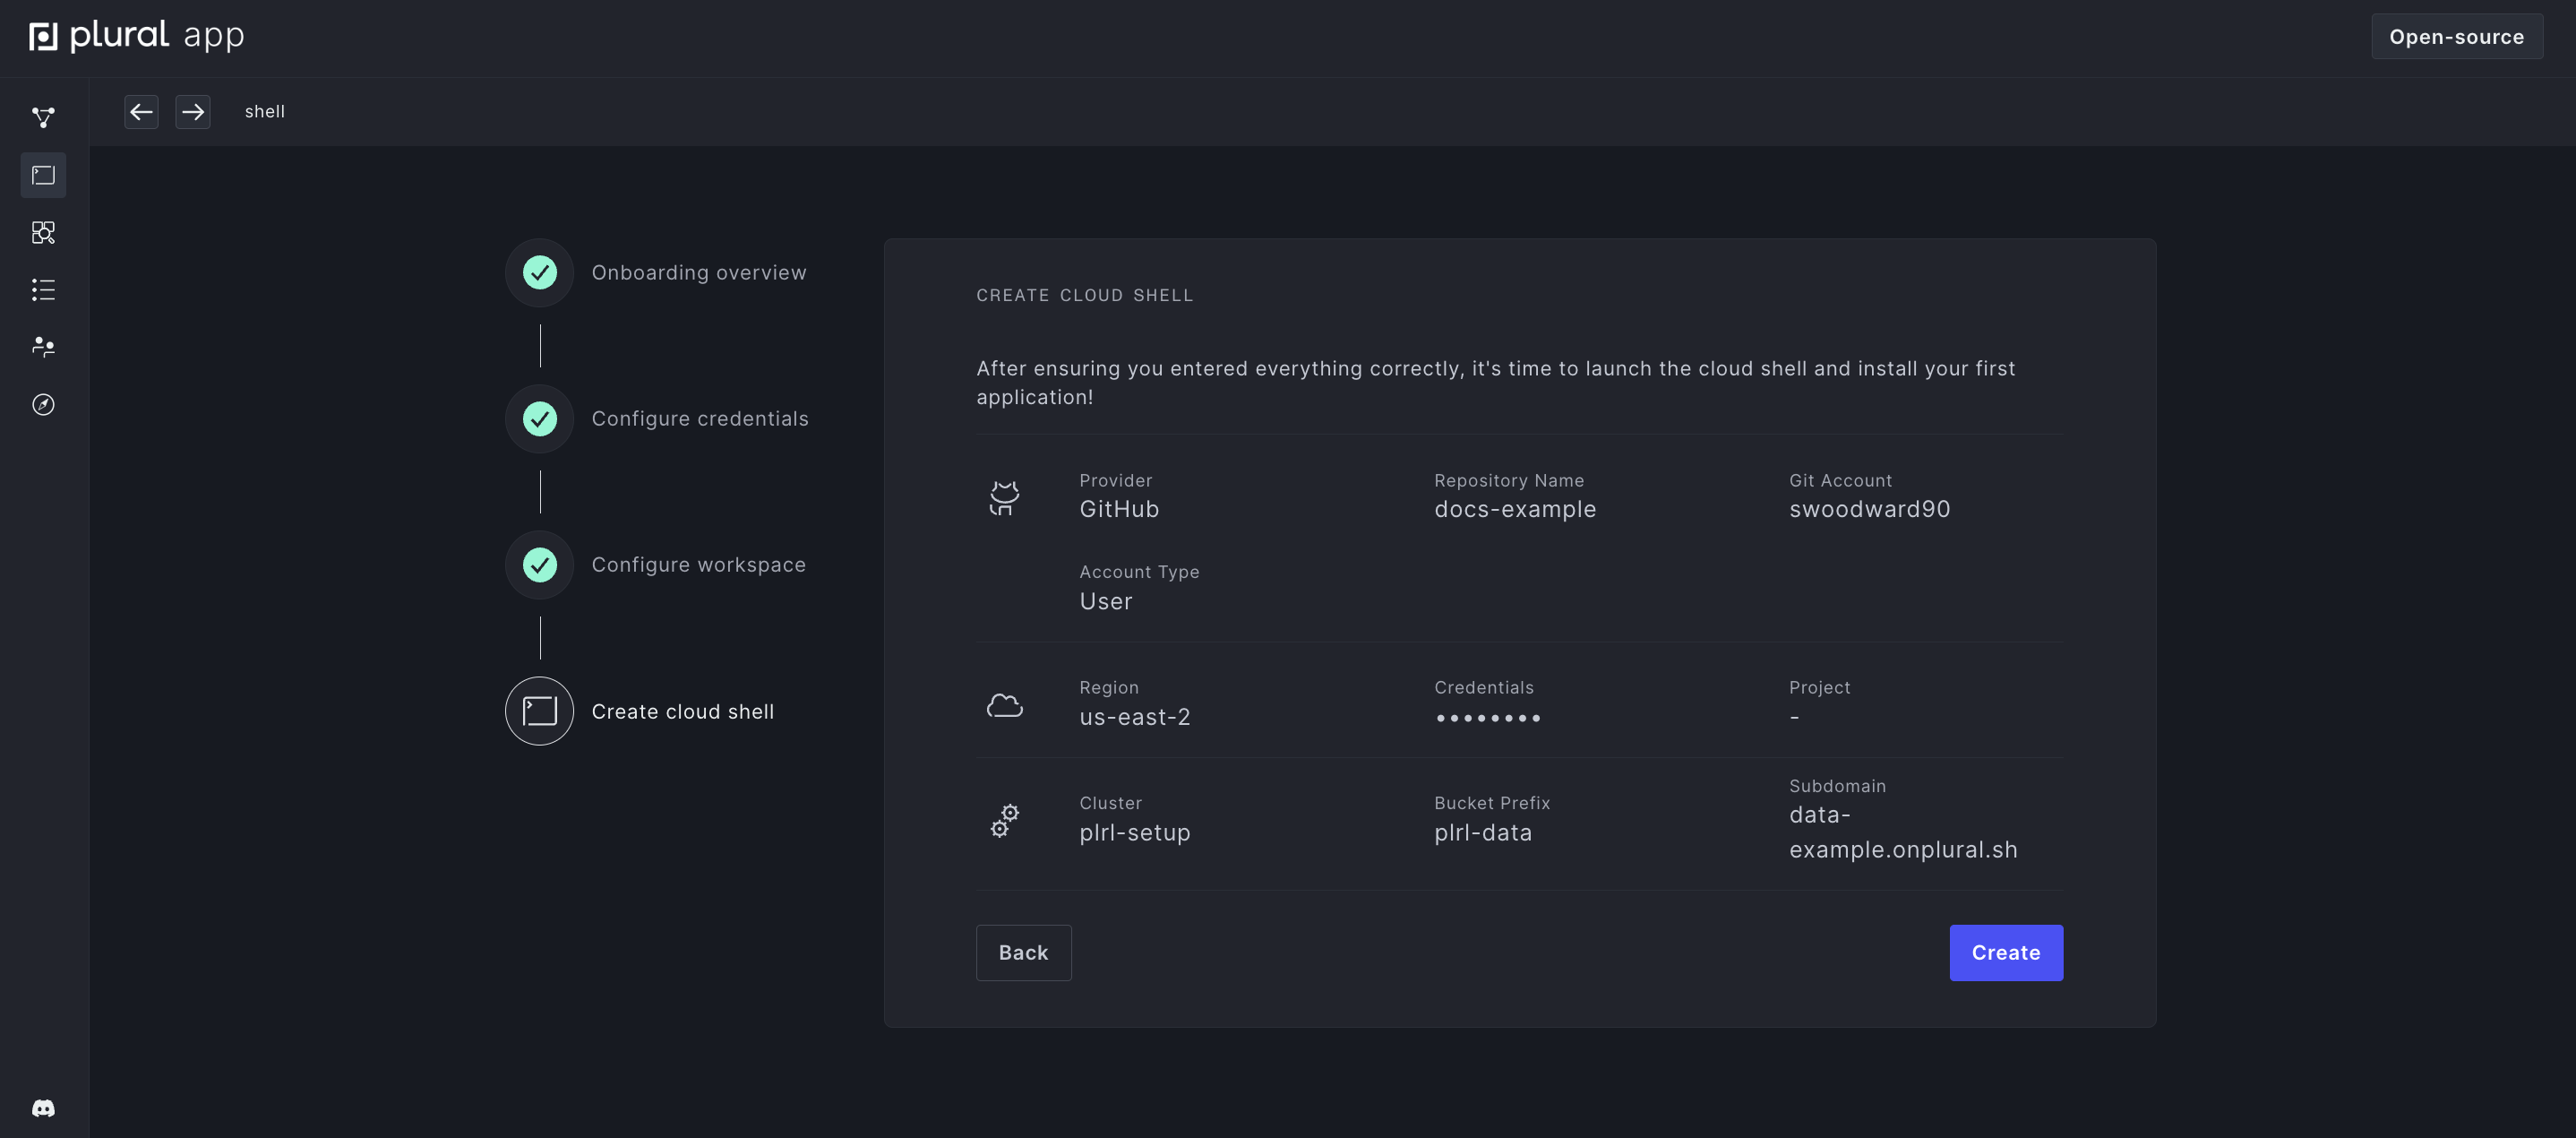
While your Cloud Shell is provisioning, double check that your repository was initialized by checking your GitHub repos. There should be a repository with an initial commit with the name that you configured.
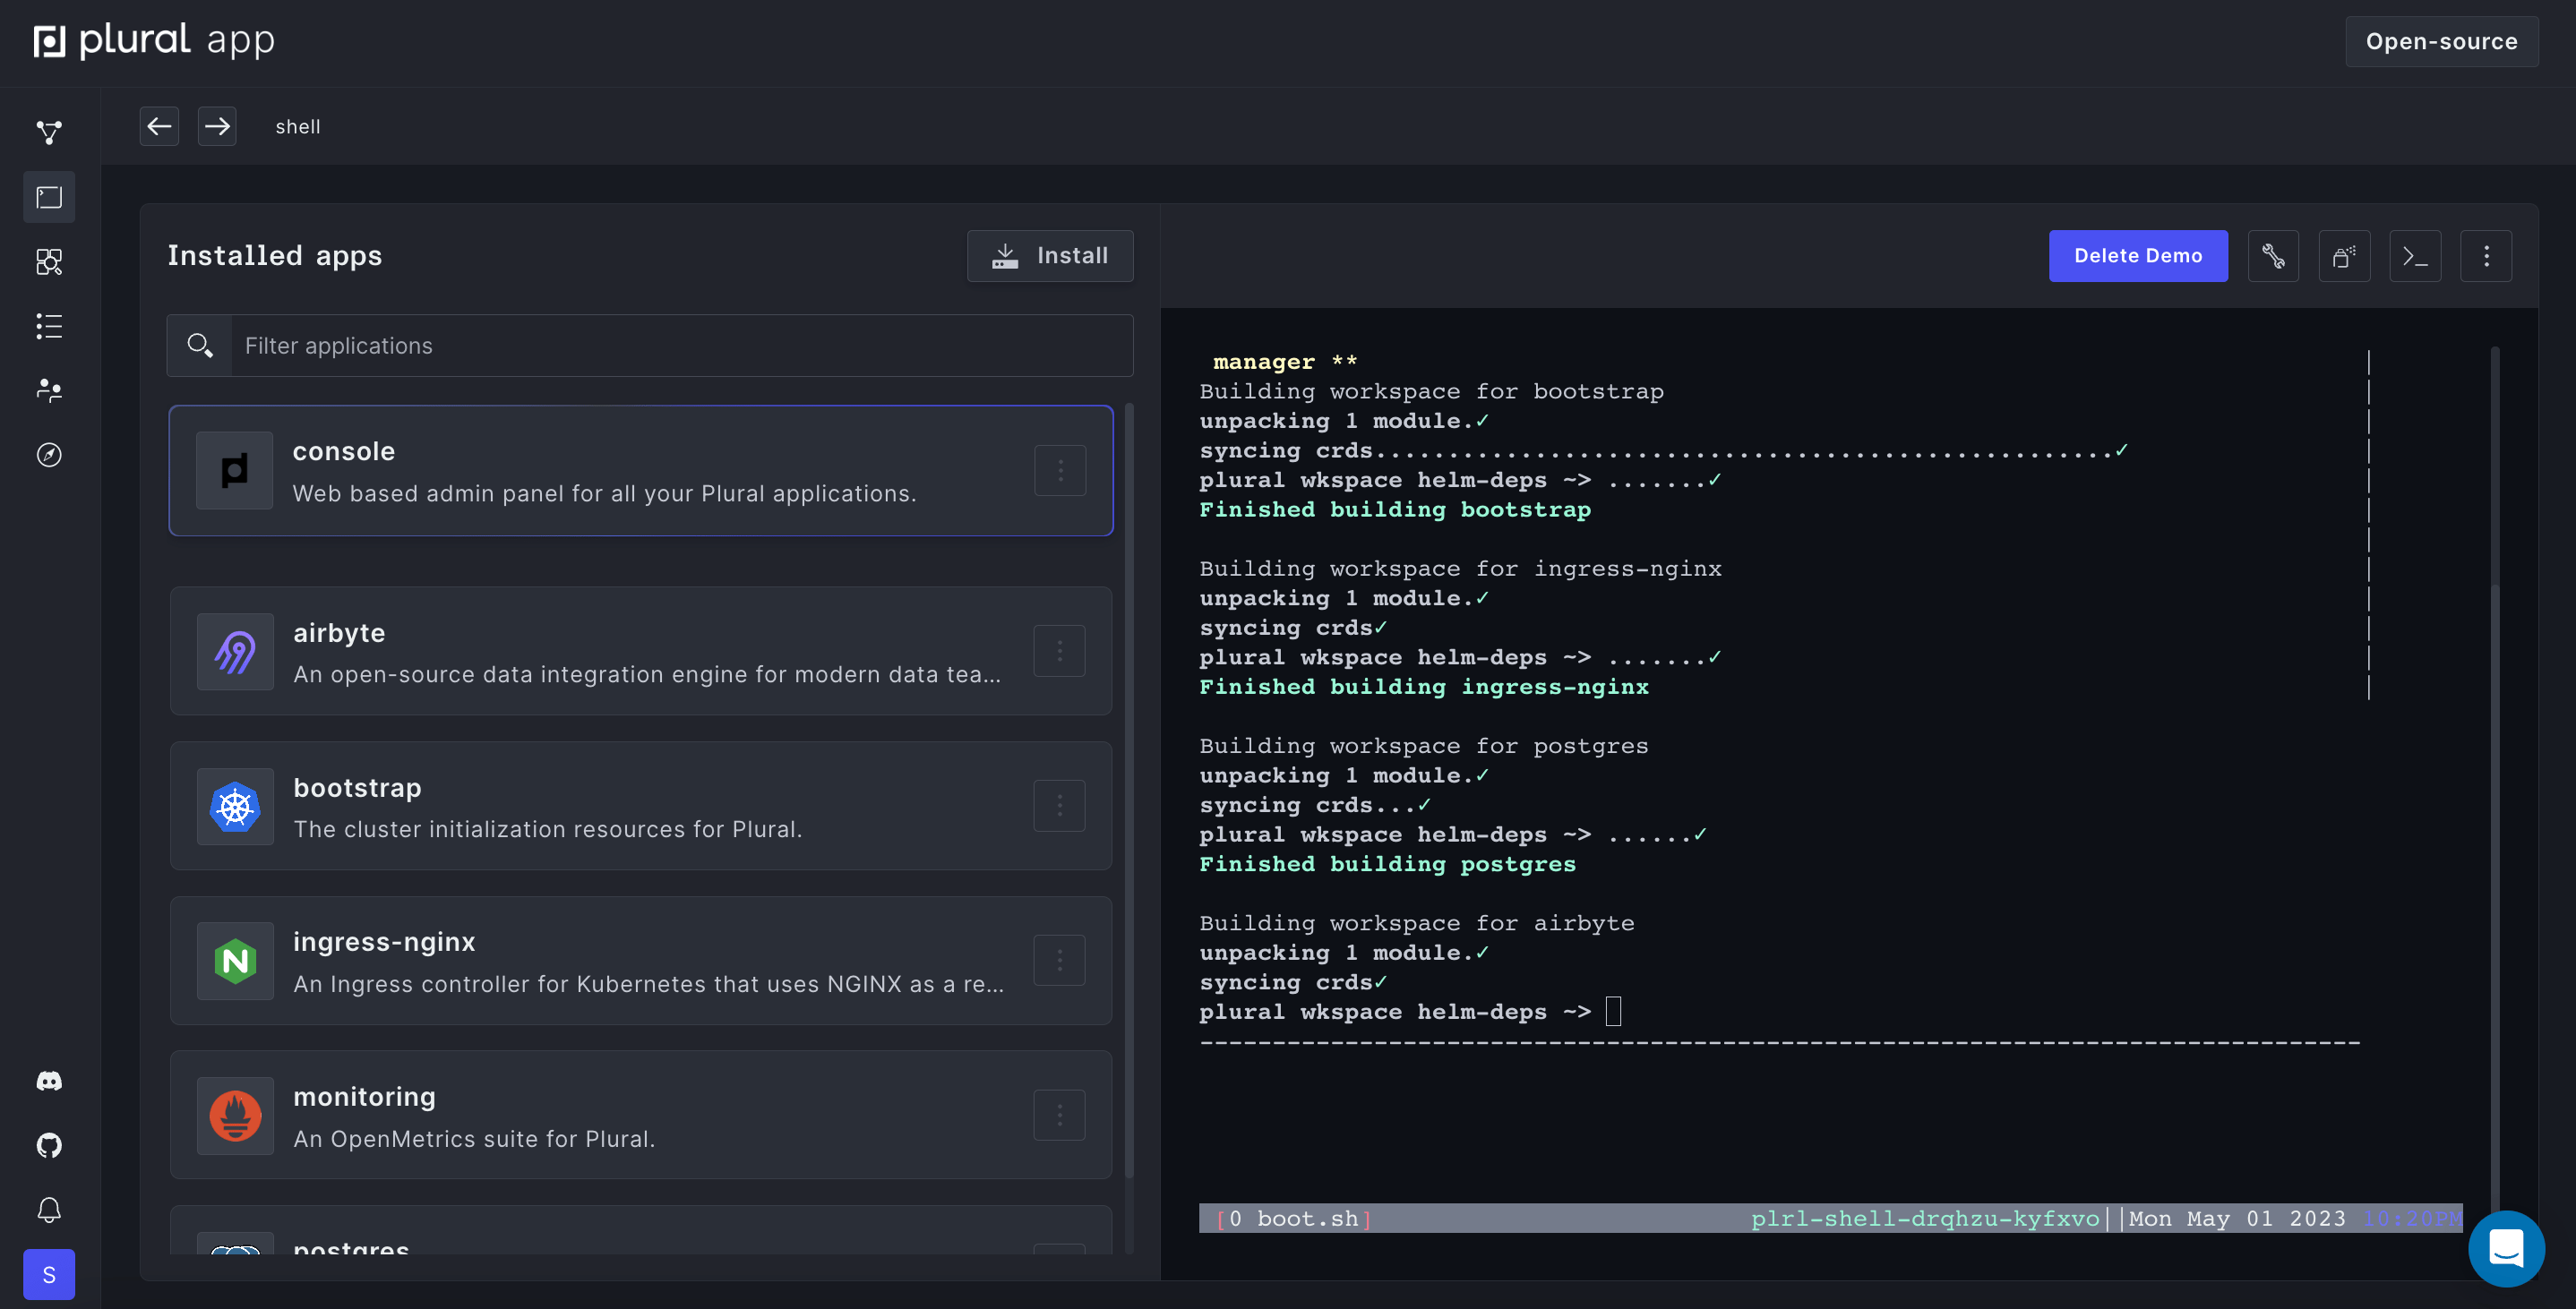
Install Wizard and Cloud Shell
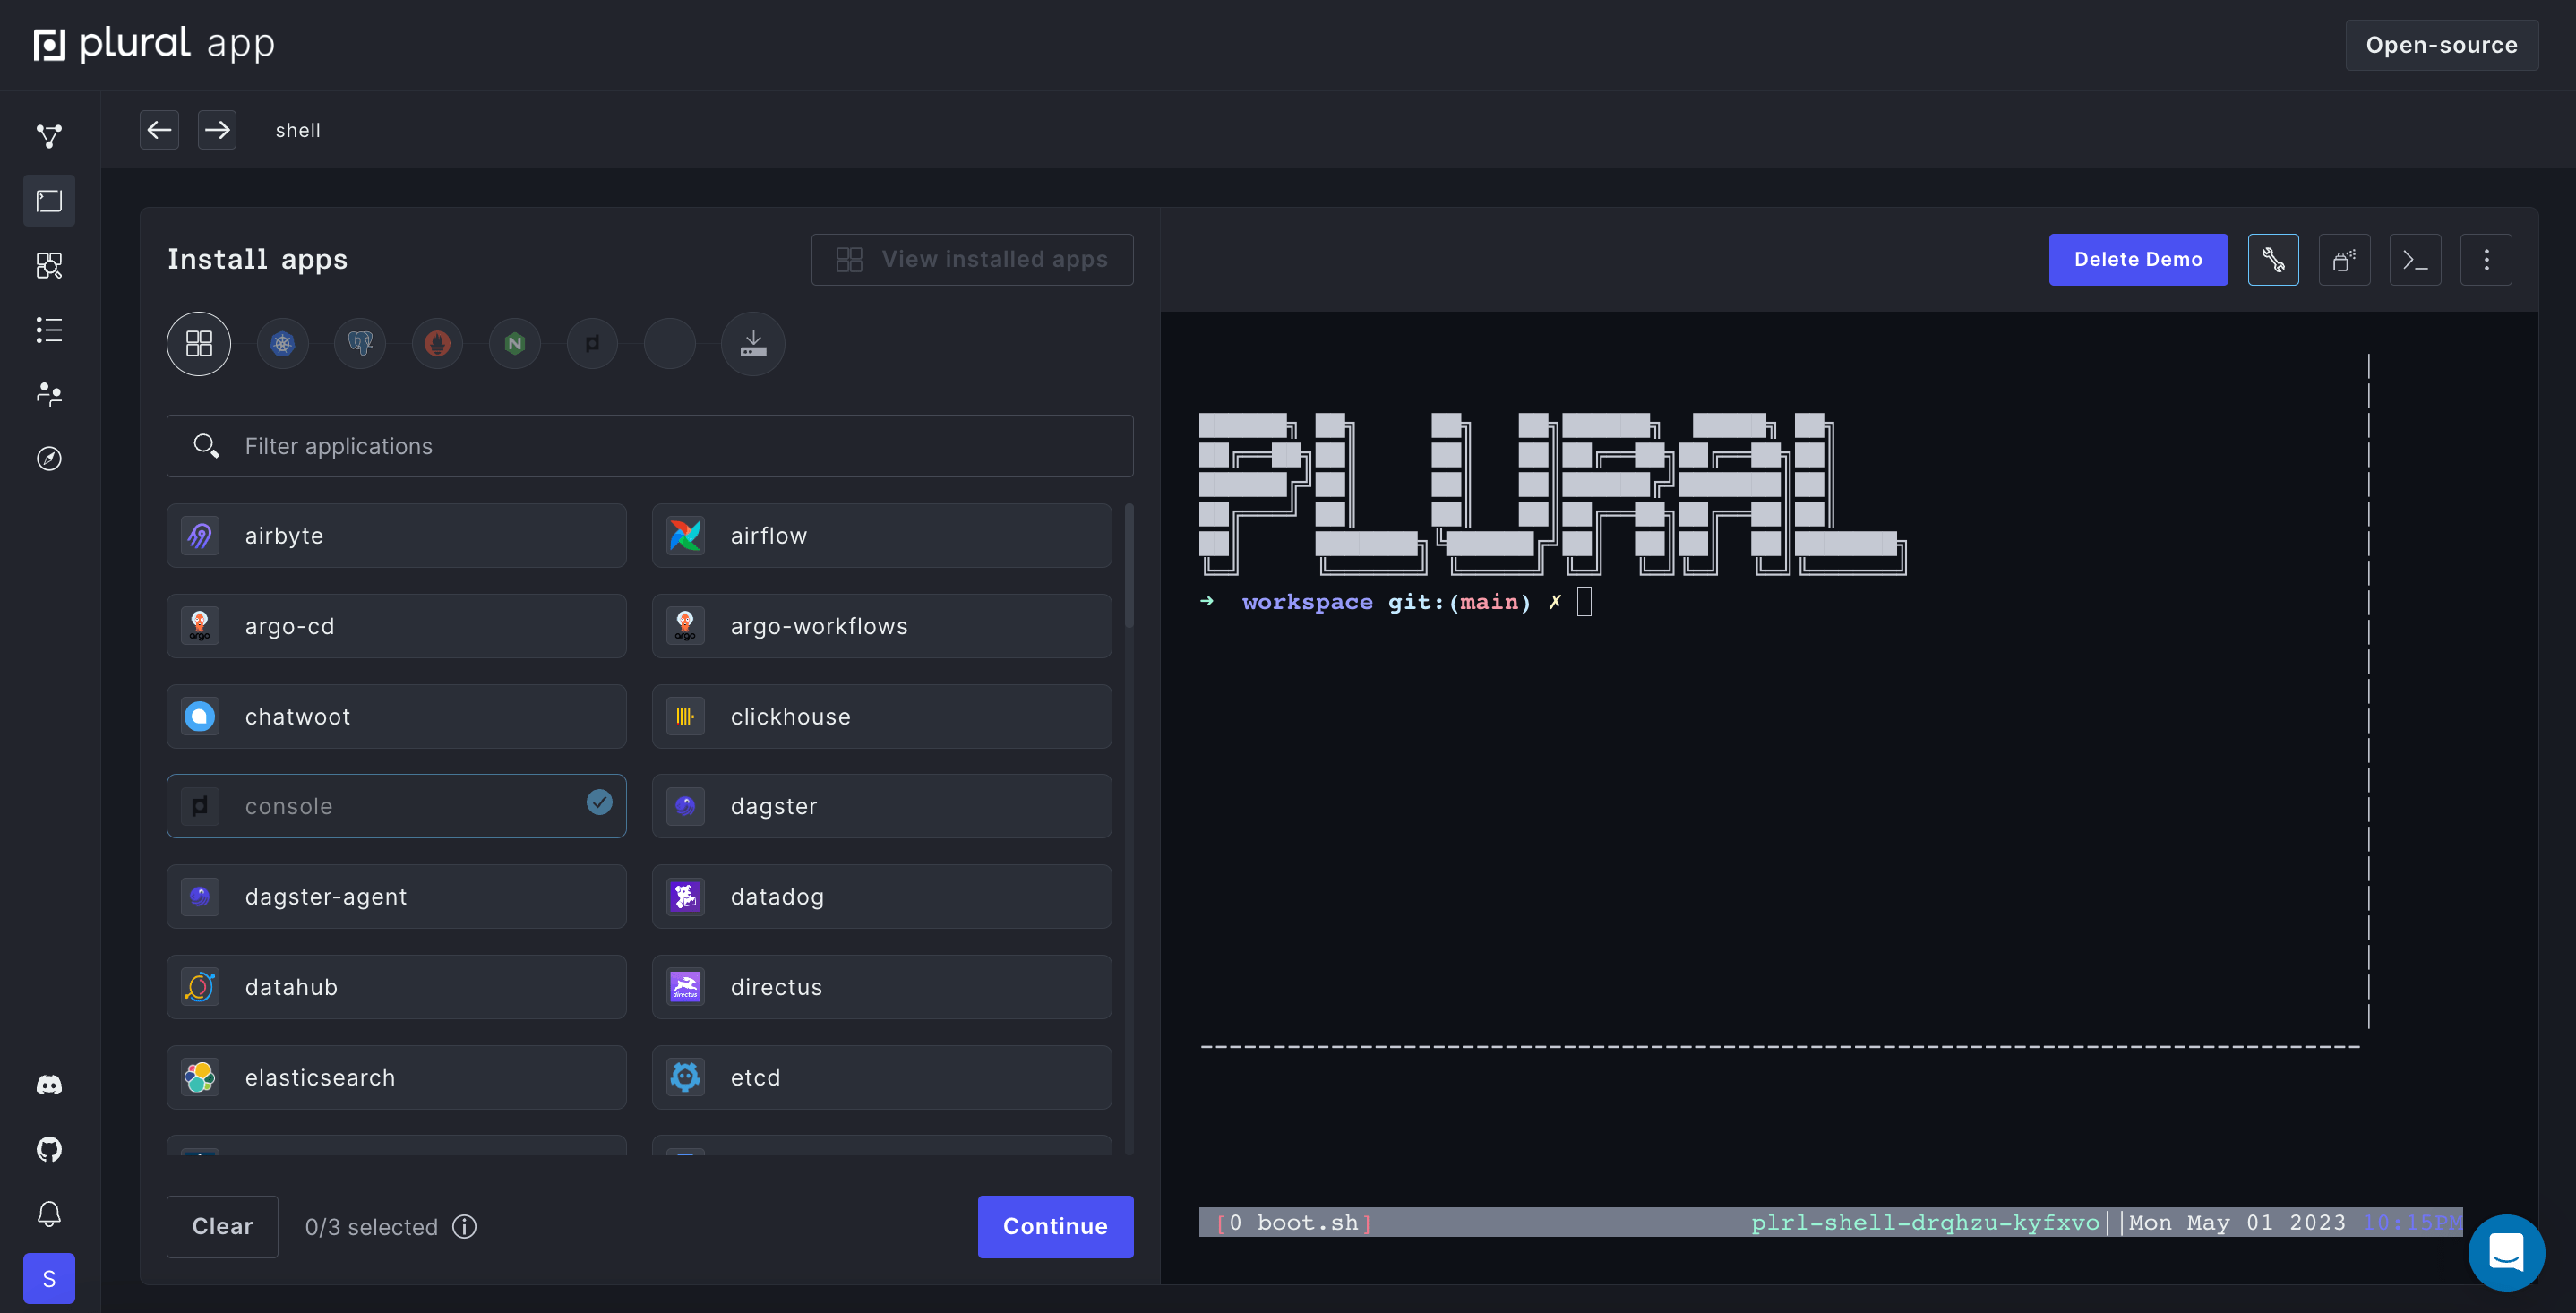
You'll be redirected into your Cloud Shell environment after confirmation. Your Cloud Shell is where you can install applications, inspect your workspace, and run terminal commands.
The left-hand side of the screen is the Install Wizard, where you can configure applications for installation. Applications can be configured and installed in a fully point-and-click manner by following the available prompts. When Plural is installing your applications, you can follow progress on the right-hand side of the screen in the terminal window.
The terminal window is an interactive shell where you can follow along with installation progress and optionally run any additional commands you need to set up your Plural instance.
Select Applications
Once you have successfully booted into your Cloud Shell, you can configure and install applications.
In the Install Wizard on the left-hand side of the screen, choose the applications you want to install on your cluster. This will add these applications and their dependencies to the configuration flow, shown at the top of the Install Wizard.
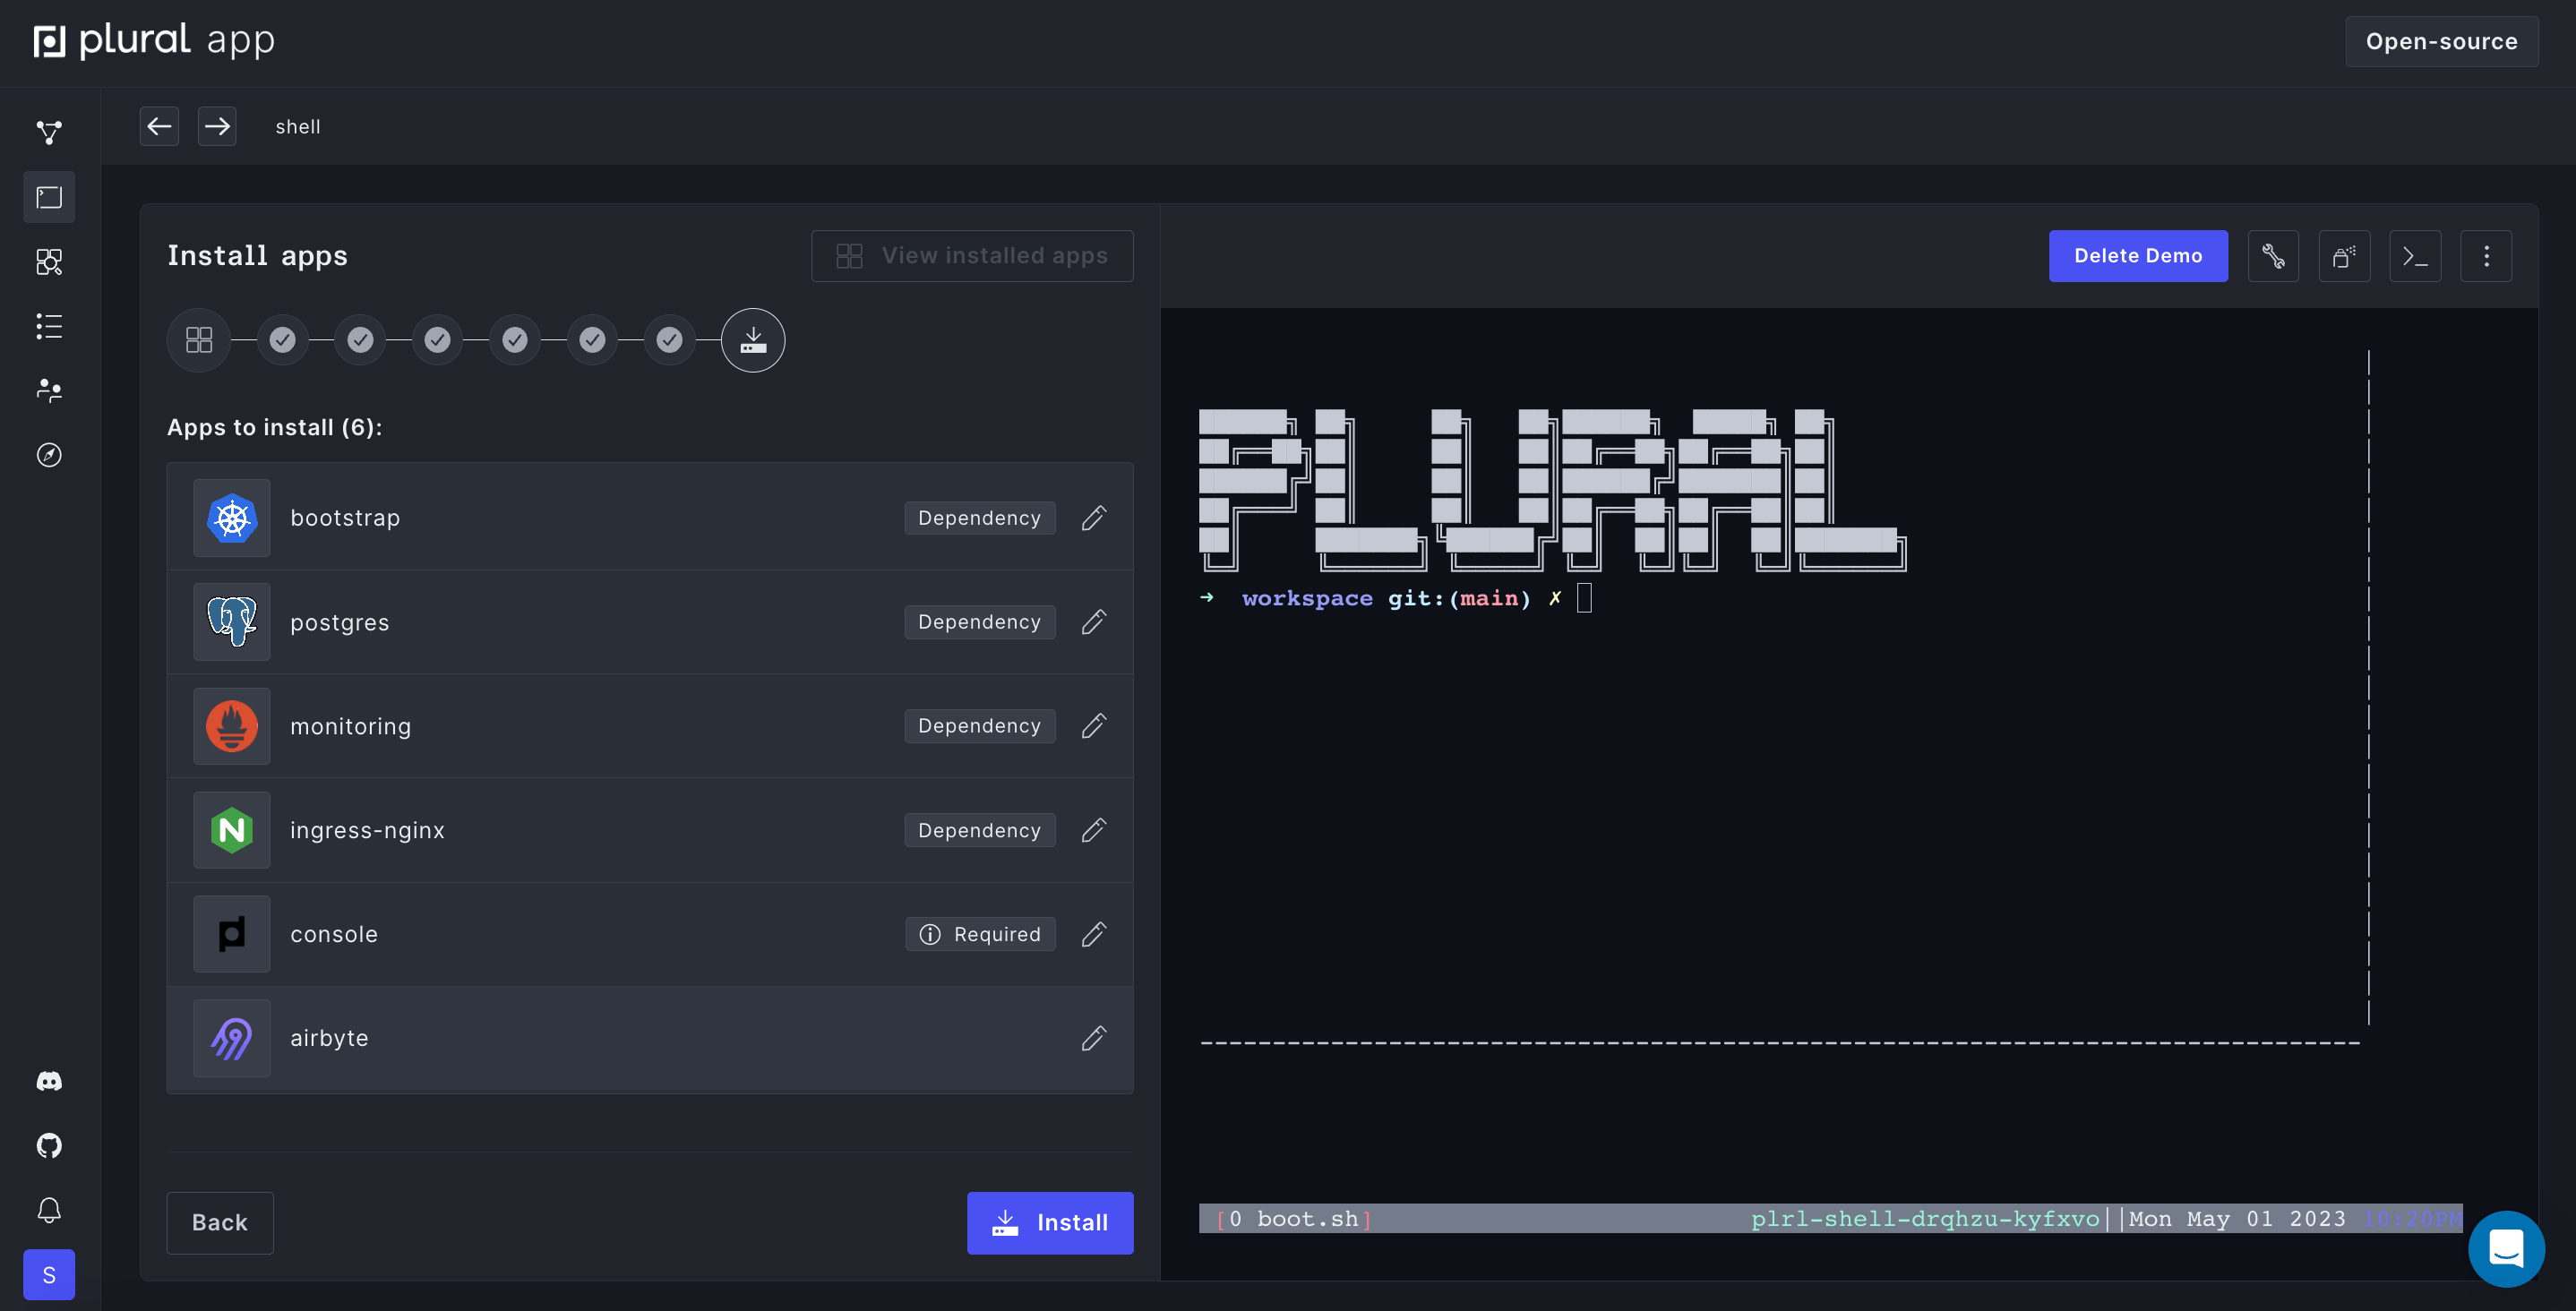
You'll now be guided through a setup wizard for the applications you chose. For help with Plural Console configuration, refer to this guide for explanations on each step. For help with configuring Airflow, refer to this guide. Required fields are indicated with a star and will appear in red until they've been populated. Many fields have default values populated; you can use those defaults or provide your own inputs. Any steps without required configuration will be auto-skipped.

After configuration, you'll be provided with an overview screen of exactly which applications will be installed. When you're happy with the configuration, click Install to proceed.
Provision the Kubernetes Cluster and Install Applications
Now it's time for Plural to write all the Helm and Terraform required to bring up your Kubernetes cluster based on the config that you've entered. When you click install, Plural will be running the commands to build and deploy your cluster. Your terminal window will display the output from these ongoing operations.
Now grab a coffee or your favorite hot beverage while we wait for your cloud provider to provision your infrastructure.
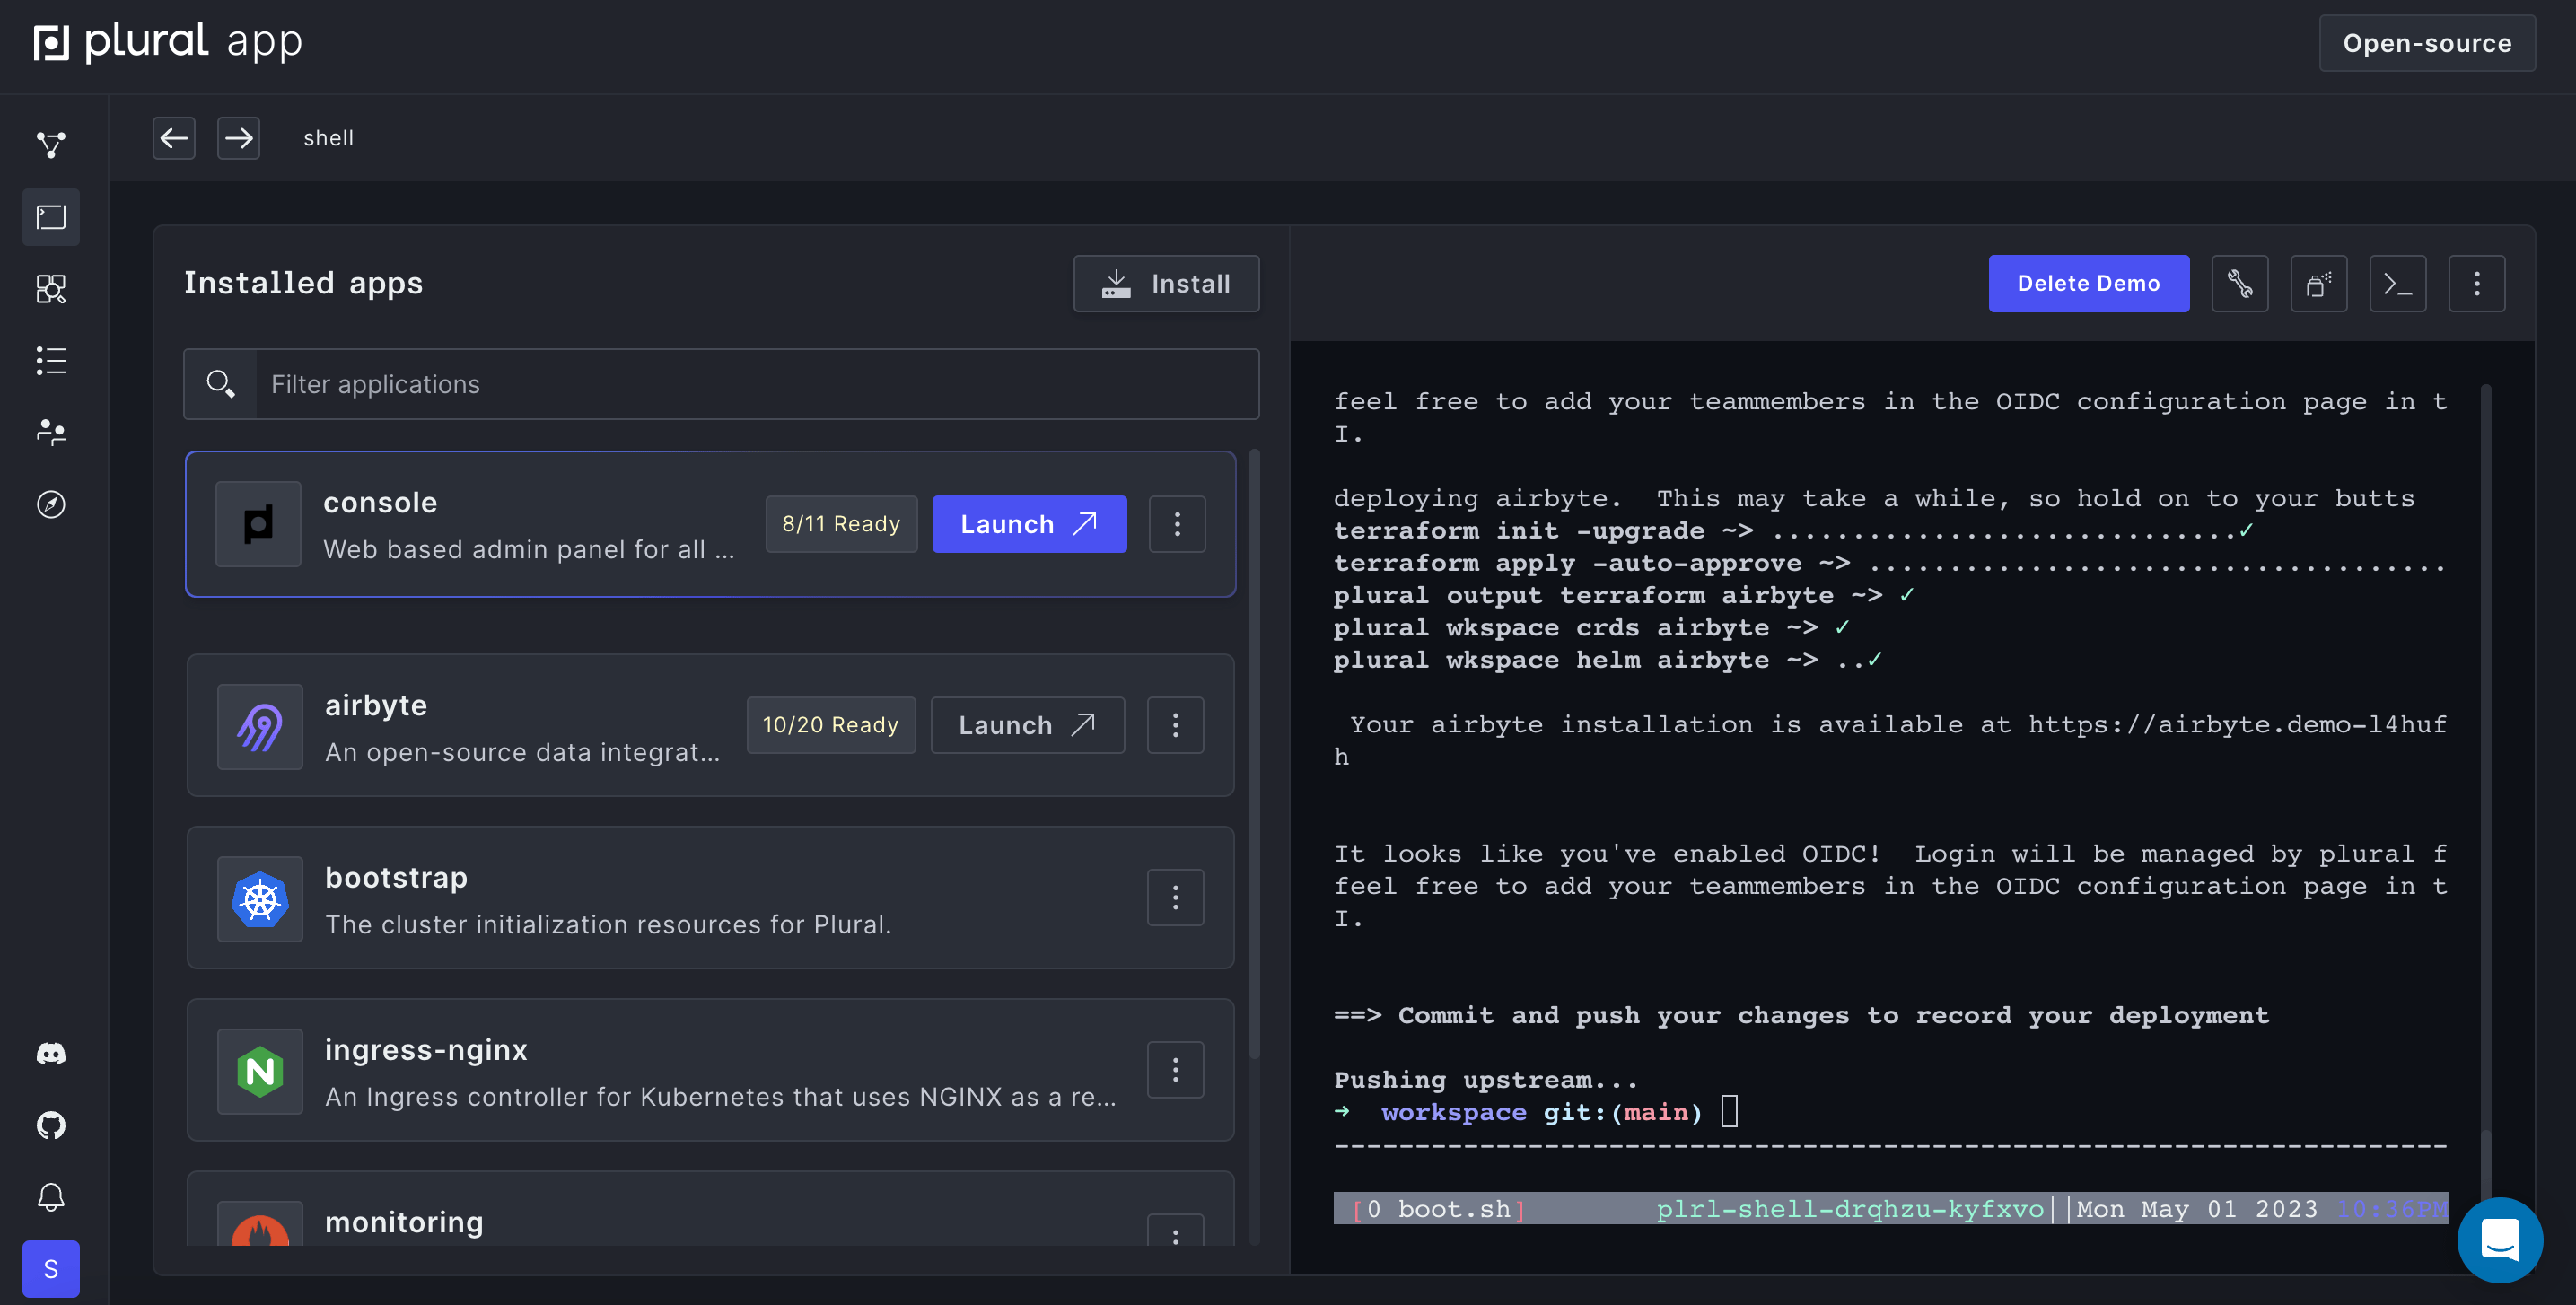
When your applications are finished installing, you'll be able to see the domains for each application in the terminal window, and you can launch them once all components are ready.
Troubleshooting
Occasionally errors can crop up during the build and deploy process. If your build or deploy fails, you can try re-running the commands to see if it resolves an intermittent issue. To do this, click into the terminal window and either tap the up arrow key to see the last command or type in plural build && plural deploy --commit "deploying a few apps with plural" to relaunch the process from where it left off and commit your changes when finished.
If errors persist, check out our Troubleshooting documentation or reach out to us on our community Discord for help.
Check out your Deployments
Plural Console
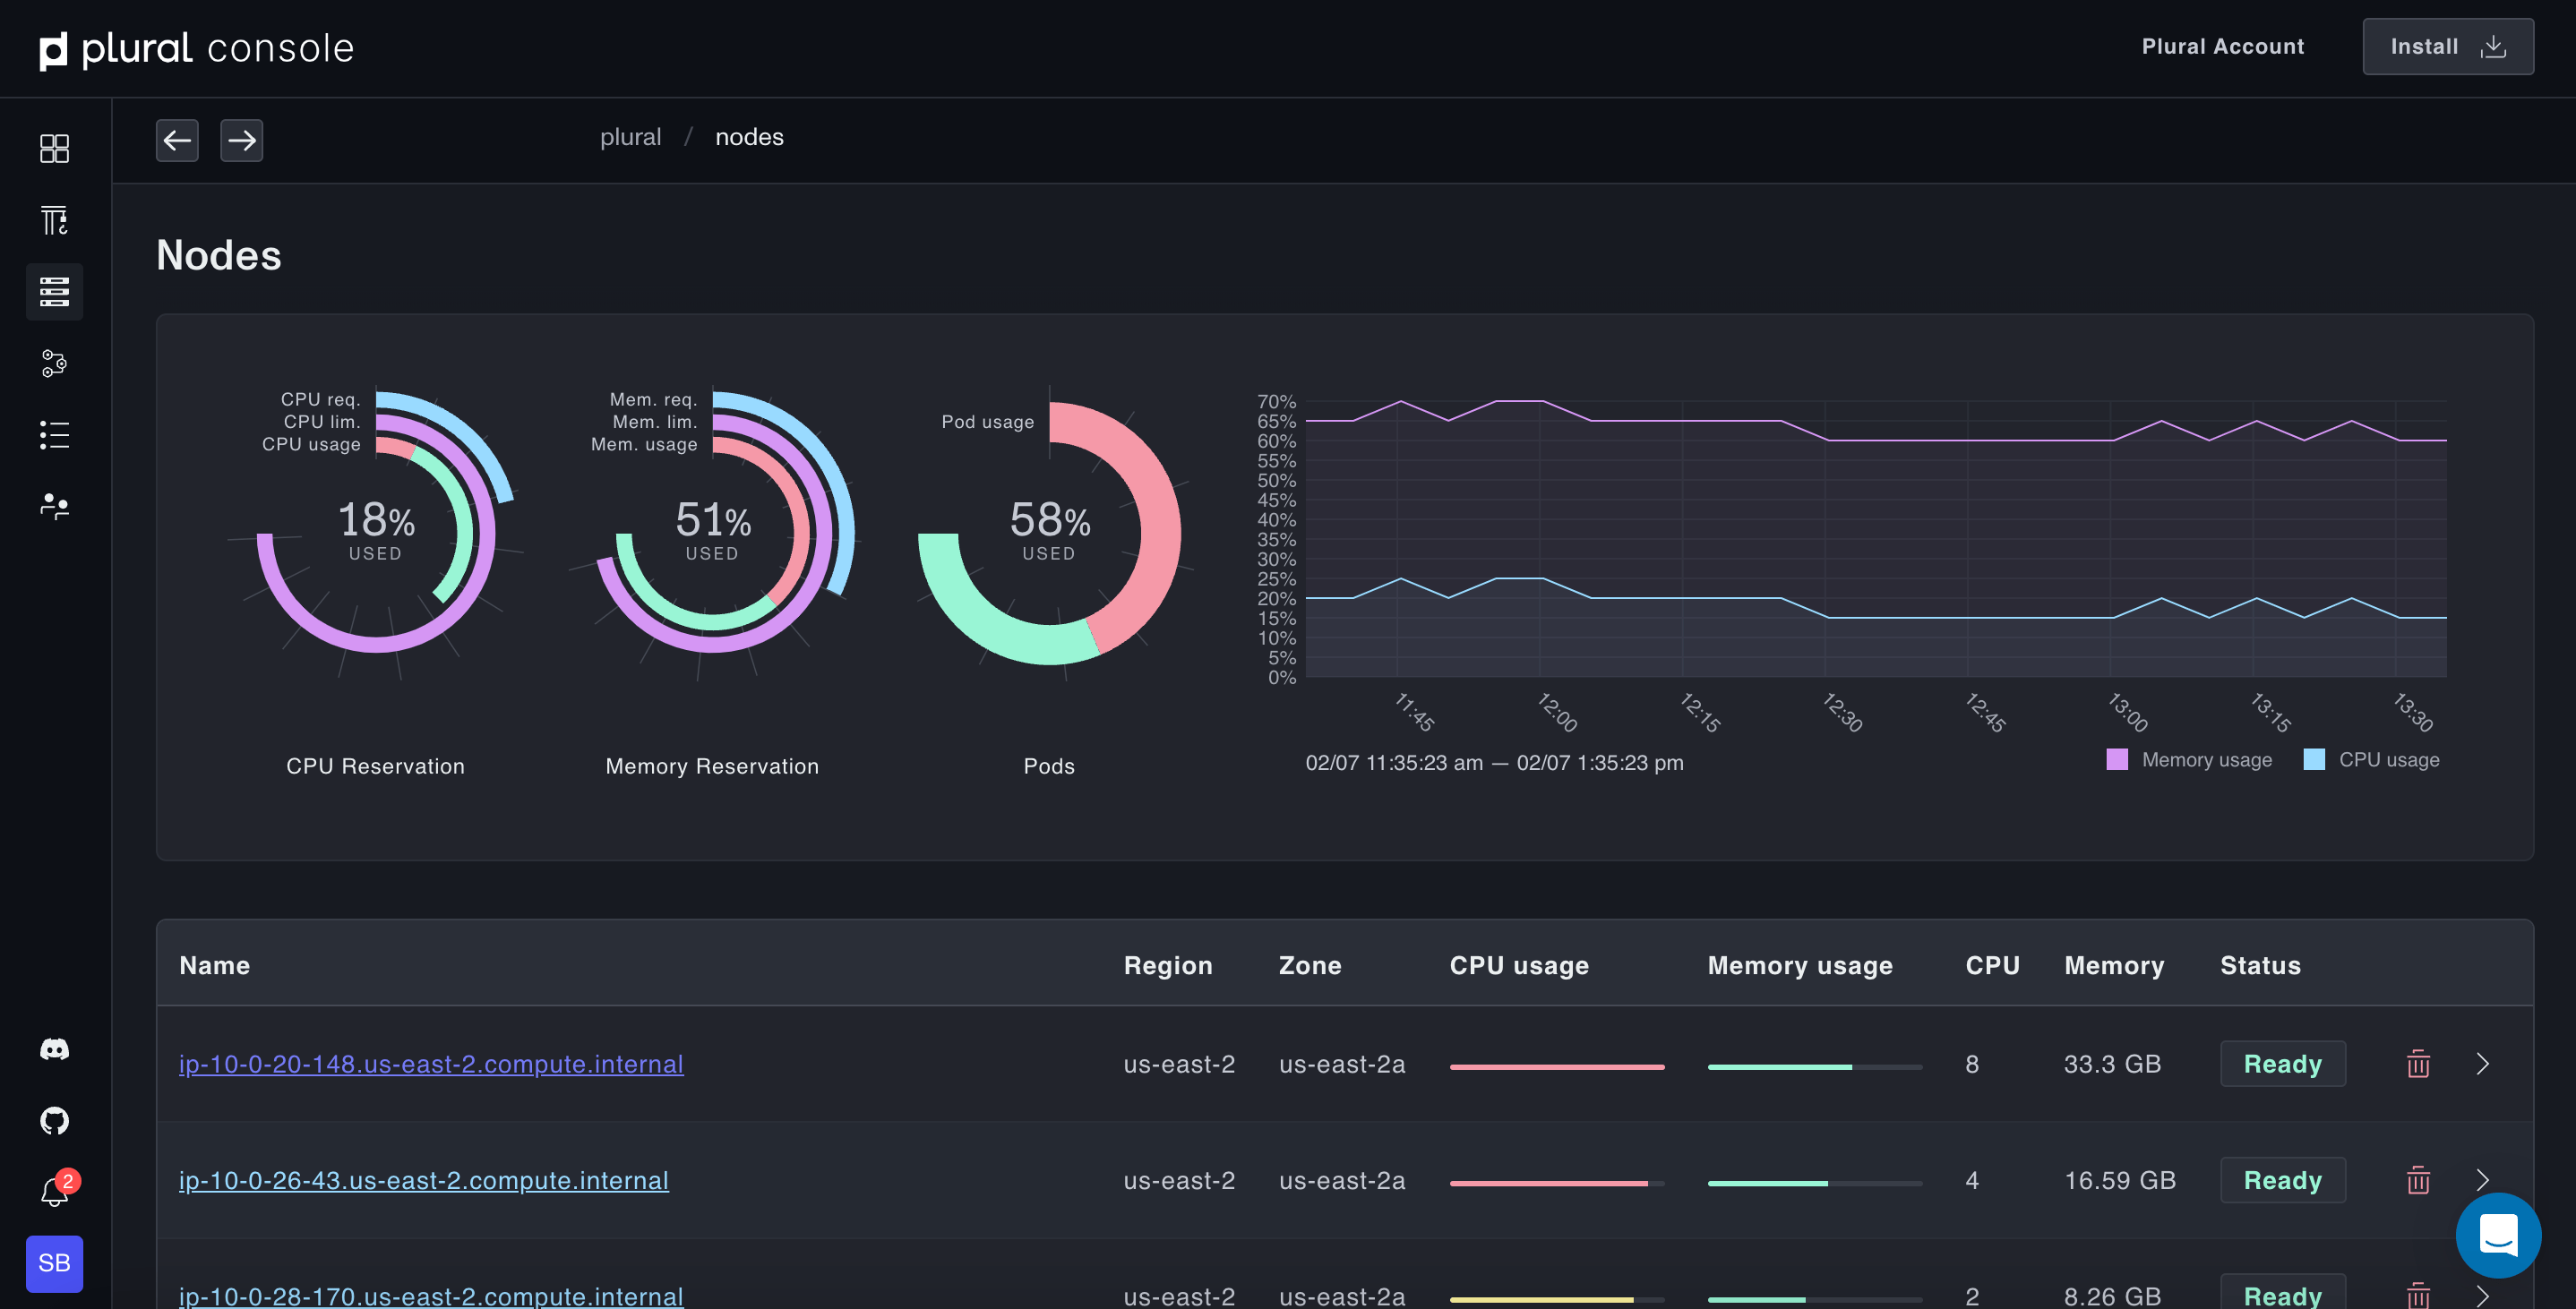
Once your cluster has completed deployment, click the Launch Console button to head over to console.YOUR_WORKSPACE.onplural.sh (or the hostname you picked) and view the console that you have provisioned. If you enabled Plural OIDC, you'll be able to quickly login using your Plural account.
Here, you'll be able to check node health, Pod health, logs, pre-built dashboards tailored for Airflow, and more.
Airflow / Other Applications
To access your Airflow installation, access it similarly to the console at airflow.YOUR_WORKSPACE.onplural.sh
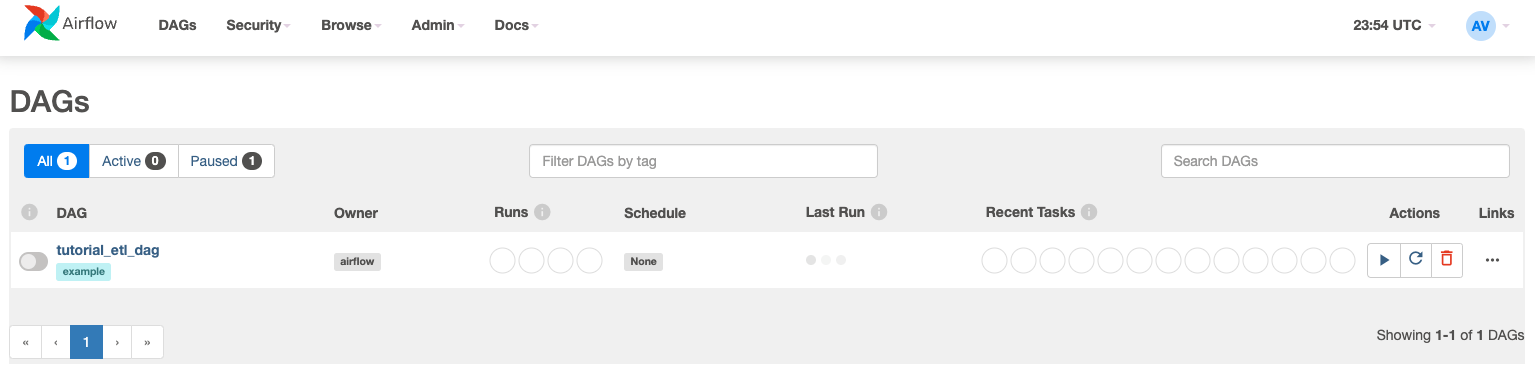
You can now access your DAGs from the GitHub repo that you set up earlier. Just add any DAGs you want to use the repo and a sync will run every 5 minutes or so to pull them in.
Accessing other applications deployed on Plural will work exactly the same way.
Wrapping Up
Now that we've set up a running cluster with Plural, we can add and remove applications to our existing cluster as we so choose.
Uninstalling Applications
To uninstall an application from your cluster, run the following in your Cloud Shell:
plural destroy <app-name>
Deleting your Cluster and Resetting the Cloud Shell
To fully delete your Plural Cluster, run the following in your Cloud Shell:
plural destroy
This will tear down your Plural Cluster and all attached installations.
To also delete the Cloud Shell itself (e.g., to change Cloud Providers or restart onboarding), click the three dots on the upper-right side of the Cloud Shell and select Delete cloud shell. This will bring up a confirmation prompt; enter "delete" to wipe your shell and restart onboarding from the beginning.
Leaving the Shell Experience
If you want to start using the CLI locally, just install the Plural CLI and run:
plural shell sync
This will sync your local installation with the Cloud Shell. You can then proceed to purge the shell if you wish to spin it down:
plural shell purge
Feedback
If you have any feedback or questions about the experience, head over to our community Discord and drop us some feedback. The Cloud Shell is still in development and we are dedicated to perfecting the user experience, so any feedback would be immensely helpful to us.