Installing Plural Console
Supercharge your day two operations.
Introduction
The Plural Admin Console is a web application that serves as a control panel for all your Plural applications. It:
- manages automated upgrades delivered from the Kubernetes api
- serves as a thin Grafana to visualize application metrics and logs
- serves as a built-in K8s dashboard for all plural apps in the cluster, along with providing app-level health checking
- is the touchpoint at which incidents can be filed with the owner of an application
Plural Console is installed by default in the Cloud Shell, and we also highly recommend installing it if using the Plural CLI. It can be deployed and managed like any other application on Plural.
Info:
The admin console is separate from app.plural.sh which is primarily a package registry.
Installation
1. Check your Git authentication method.
# show repo remote with details
git remote -v
If the remote urls start with git@github.com then you're using SSH.
If the remote urls start with https then you're using HTTPS.
2. Setup for Git authentication
If you modified context.yaml to reconfigure your git auth, be sure to run:
plural build --only console ## wires the creds into the console helm chart from context.yaml
plural deploy
3. Install and build the Console
The plural console is installable like any other plural app. To find the available bundles, just run:
plural bundle list console
Then once you've found an eligible bundle to install, do:
plural bundle install console <bundle-name>
You will now be guided through a configuration wizard. If you have any questions about a specific parameter, refer to this document.
Once the bundle has installed, run:
plural build
The console takes over the gitops flow of managing plural apps for you. You will be asked for the git authentication credentials you created at Step 1.
4. Deploy Console
Once the build has completed, run:
plural deploy --commit "installed console"
5. Login to Console
Once the deploy finishes, it will output the url that the console has been deployed to. Navigate to that url and it will show a login screen that looks like this:

If you selected (y) to OIDC, one-login has already been configured, and you'll be able to sign in with the same credentials you use for app.plural.sh.
If you didn't select (y) to OIDC, your login credentials for this console are different from your login credentials for app.plural.sh. You can find them inconsole/helm/console/values.yaml under the console.secrets.admin_username and console.secrets.admin_password keys.
Console Highlights
The Console is the command center for your Plural applications, and it comes with built-in goodies. Some highlights include:
Application Overview
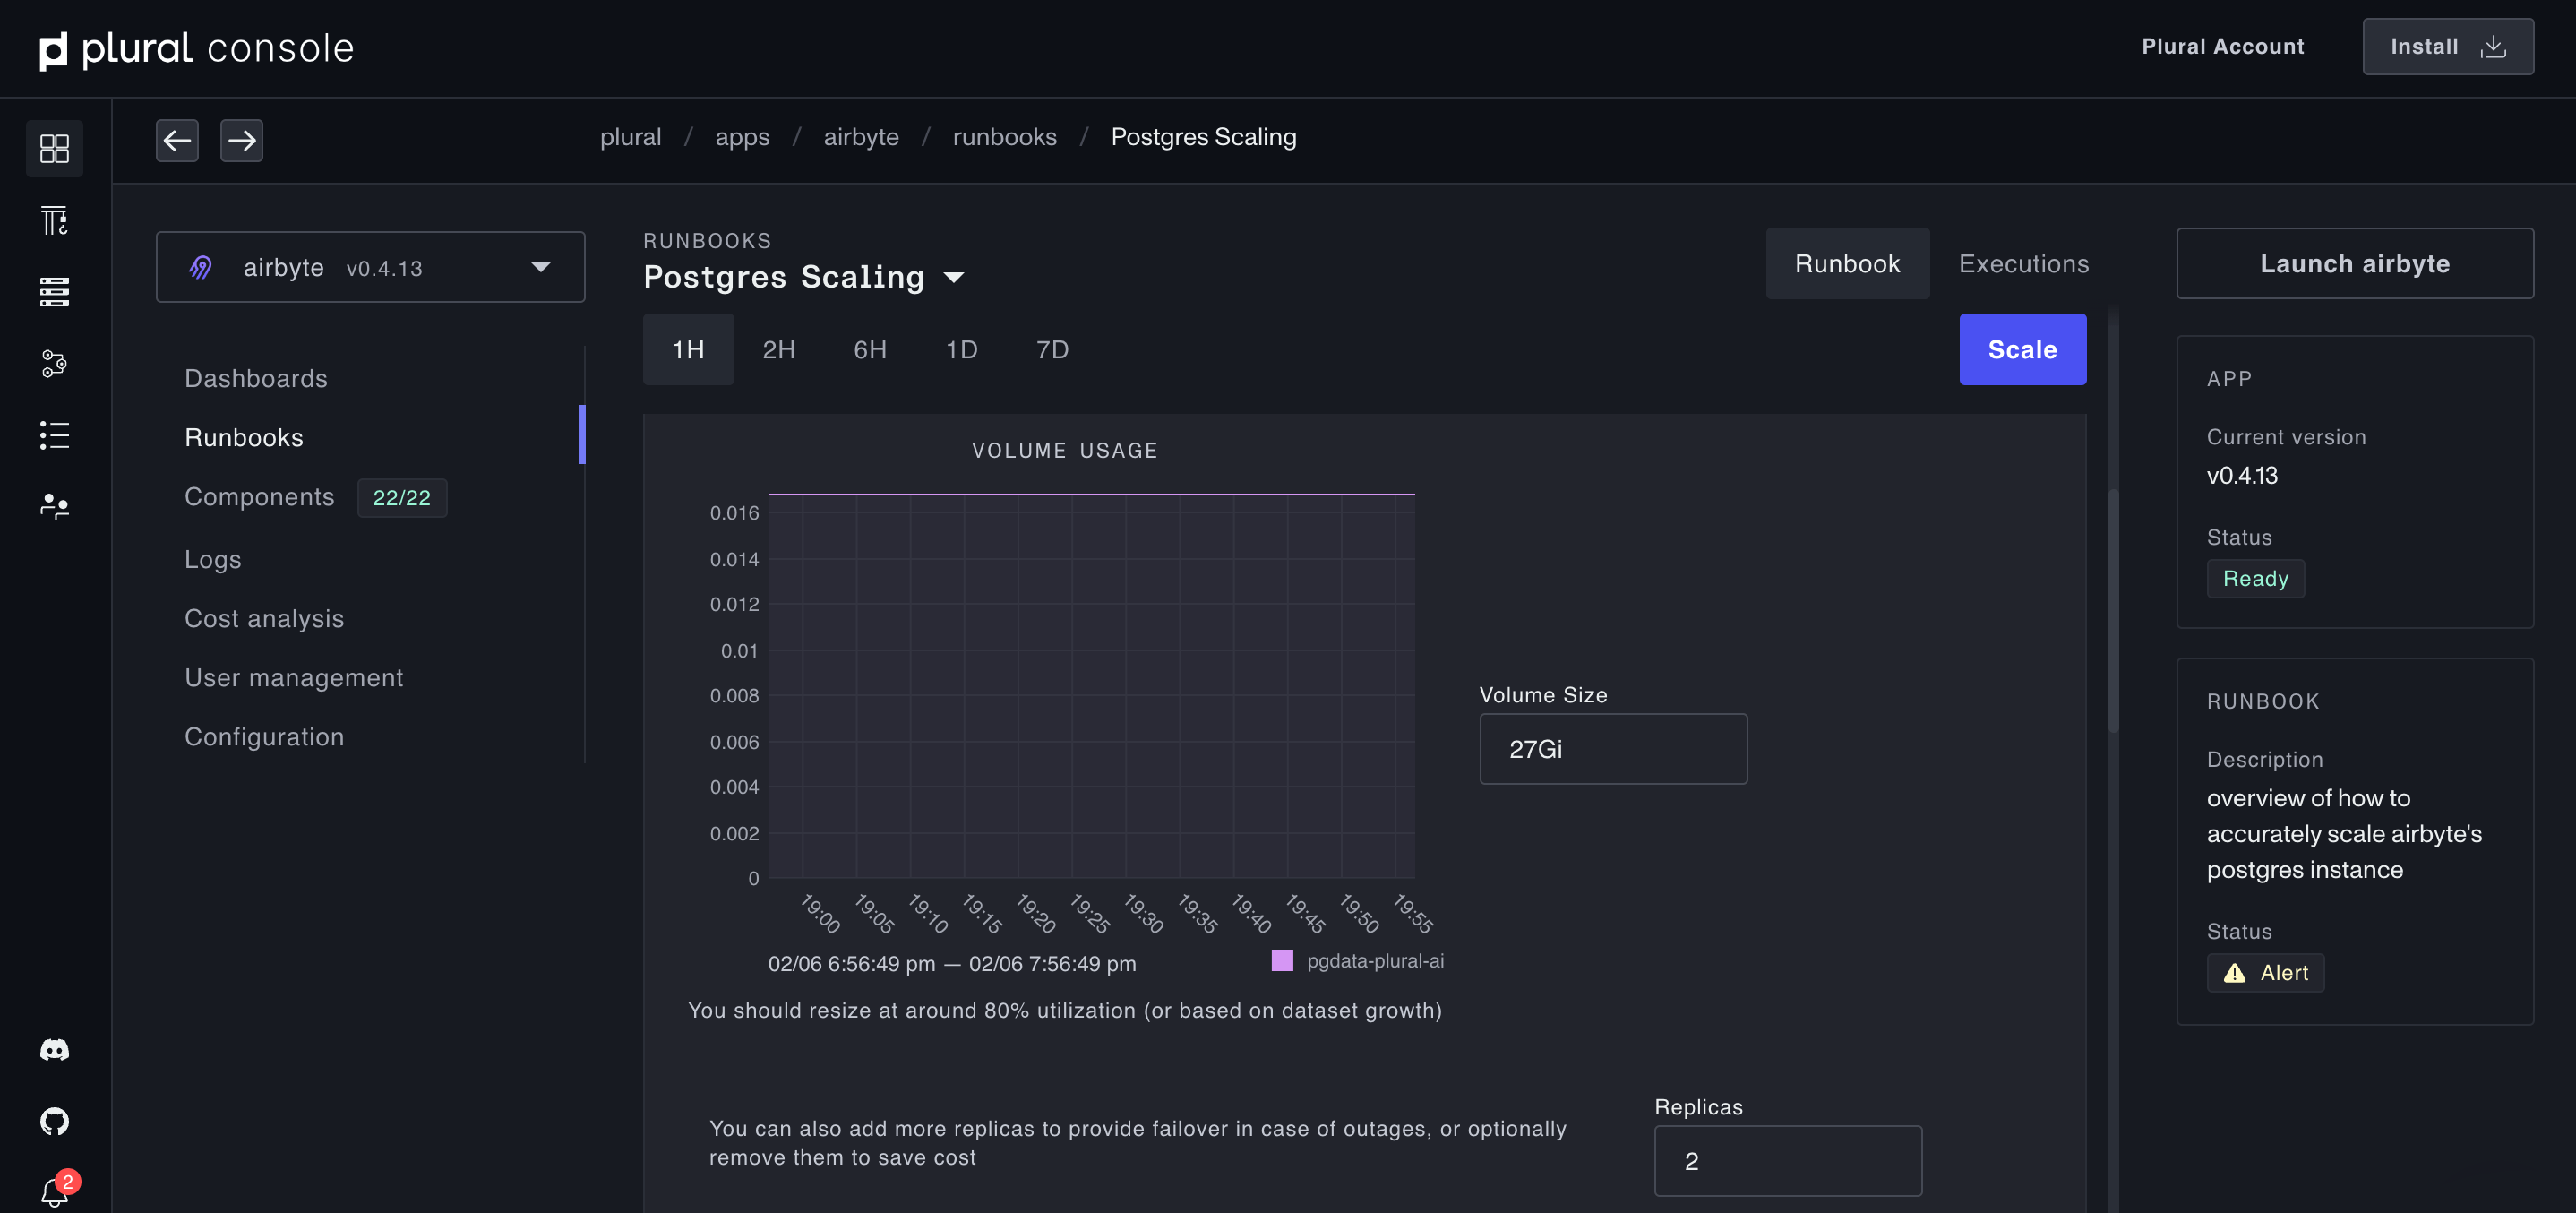
The first place you'll land in the Plural Console is the Application Overview. Here you can see all installed applications, along with their version and status. Clicking into an application shows all available dashboards, runbooks, an overview of components related to that application, cost analysis, user management, and configuration options.
The features in this section can be used to manage applications. As an example, select applications have interactive runbooks that serve as guided tutorials for advanced operations on Plural applications.
Builds Overview
The Builds Overview shows all scheduled, running, and completed builds. Completed builds will display the status of that build, and clicking into an individual build shows the build output and available actions to take.
Nodes Overview
The Nodes Overview gives you an overview of your Kubernetes cluster, including total memory and CPU reservation, as well as the detail on each individual node.
Clicking on a node shows the pods assigned to that node, along with metadata and events associated with that node.
Pods Overview
The Pods Overview gives a filterable list of pods, their status, and running containers. Pod details give more information on containers, conditions, available metadata, and access to logs.