Creating a DNS Zone in Console
Sign in to the AWS Management Console and open the Route 53 console at https://console.aws.amazon.com/route53/.
If you're new to Route 53, choose Get started under DNS management, and then choose Create hosted zones.
If you're already using Route 53, choose Hosted zones in the navigation pane, and then choose Create hosted zones.
In the Create hosted zone pane, enter a newly registered domain (eg
pluraldemo.com), or a subdomain (eg,plural.pinterest.com).For Type, accept the default value of Public hosted zone.
Choose Create hosted zone.
Now in the navigation pane, click Hosted zones. On the Hosted zones page, choose the radio button (not the name) for the hosted zone, then choose View details.
On the details page for the hosted zone, choose Hosted zone details. Make note of the four servers listed for Name servers. You will need these records to proceed with Step 3.
In your Google Cloud Console, go to your Plural project and enable the Cloud DNS API.
In your Google Cloud Console, go to the Create a DNS zone page.
For the Zone type, select Public.
For the Zone name, enter an appropriate string.
For the DNS name, enter a DNS name for the zone , enter a newly registered domain (eg
pluraldemo.com), or a subdomain (eg,plural.pinterest.com).Under DNSSEC, ensure that the
Offsetting is selected.Click Create to create a zone populated with the NS and SOA records.
On the Zone details page, retrieve the Name server (NS) records. You need these records to proceed with Step 3.

- In your Azure console, at upper left, select Create a resource, then Networking, and then DNS zone.
- On the Create DNS zone page, type or select the following values:
- Name: The DNS zone name can be any value that is not already configured on the Azure DNS servers. A real-world value would be a newly registered domain (eg
pluraldemo.com), or a subdomain (eg,plural.pinterest.com). - Resource group: Select Create new, enter MyResourceGroup, and select OK. The resource group name must be unique within the Azure subscription.
- Name: The DNS zone name can be any value that is not already configured on the Azure DNS servers. A real-world value would be a newly registered domain (eg
- Select Create.
- With the DNS zone created, in the Azure portal Favorites pane, select All resources. On the All resources page, select your DNS zone. If the subscription you've selected already has several resources in it, you can enter your domain name in the Filter by name box to easily access the application gateway.
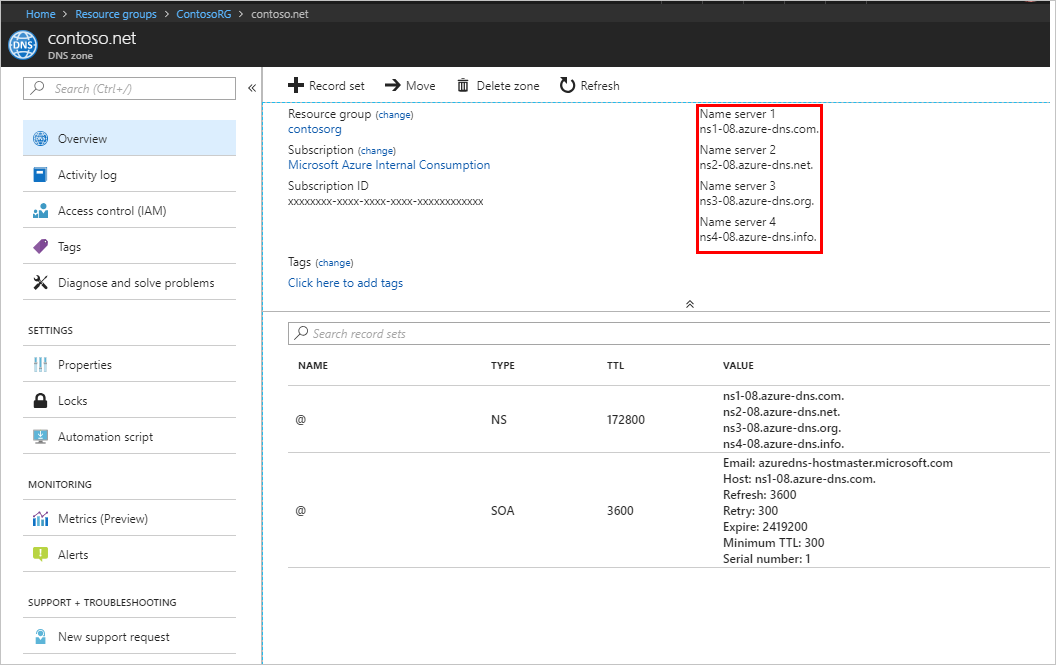
- Retrieve the name servers from the DNS zone page. In this example, the zone
contoso.nethas been assigned name serversns1-01.azure-dns.com,ns2-01.azure-dns.net, *ns3-01.azure-dns.org, andns4-01.azure-dns.info
